| US/JA 15
Yagi Renovation at PJ2T
9-13 July 2007
|
|
| US/JA 15
Yagi Renovation at PJ2T
9-13 July 2007
|
|
This antenna was fabricated in Curacao in September of 2002 by W0CG from parts that we shipped to the island in April 2001. Many of the parts originally were on an antenna at K3LR. Tim then sold the stuff to K8DX who in turn sold them to CCC in April. We did not have a design or complete components at that time. We simply threw all these disorganized parts on the boat, hoping that we would be able to make an antenna out of them on Curacao. This is the only PJ2T antenna that was done in this haphazard fashion, but we were out of time and had to make the ocean shipment.
WC4E and W8AV both participated in the electrical design, and W0CG did the actual fabrication.
We originally used many steel components on this antenna, particularly the huge 3 inch saddle clamps, 1.25 inch element to plate clamps, and the truss vertical support. We knew better, but didn't have the resources or access to anything better at the time. In addition, the overhead boom truss was 1/4 inch EHS guy cable. Knowing what salt would do to this steel, I coated every square millimeter of exposed steel with epoxy primer (two coats) and epoxy paint (2 coats) before the antenna went up. It was not enough. The antenna was installed on the tower in November of 2002 and by mid-2006 it was obvious that the epoxy was oxidizing away along with the steel and the aluminum boom. It then became urgent to get the antenna down and repaired before the irreplaceable 3 inch boom material was eaten through and useless.
Prior to permanent installation in November 2002, K8NZ, N8BJQ, WC4E, and K1AR parked it temporarily on our Europe tower at a height of about 30 feet for the CQWW SSB weekend, going on to win that contest. It played well into the States but not, of course, to JA. K1AR ran over a 400 hour the first hour of the contest on this antenna.
Many thanks to CCC member Mal, NP2L, whose large cash donations paid for almost all of the year long 2006-07 PJ2T antenna and tower renovation project, including this particular antenna. Thanks also to Paul, NO8D, DX Engineering, for making these top quality components available to the ham public. Also, CCC is indebted to DL6LAU, DH7SA, DL8OBQ, and DJ8NK whose presence during IARU week and their willingness to help get this antenna down and back up made the whole thing possible.
Click here for photos from installation of this antenna in November, 2002.
| September 11, 2002. A cloudy day when I started this project by digging out all of the pieces of 3 inch boom stock and couplers we had on site and started trying to figure out what we had that would add up to a boom. | 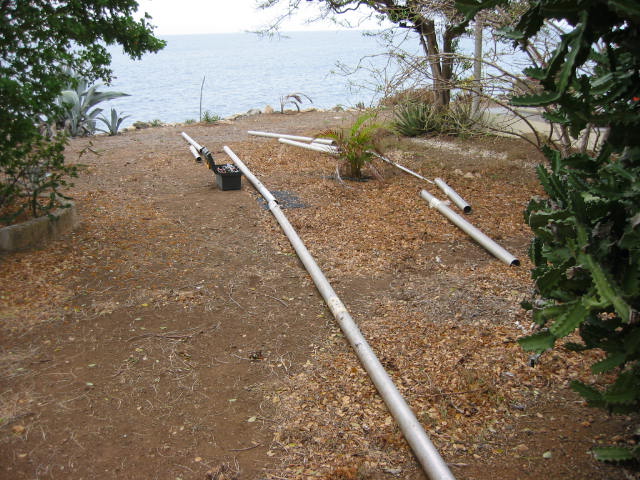 |
| This is the antenna ready for installation in September 2002. Then we had to wait until we had enough people on hand to put it up, which turned out to be November 2002. | 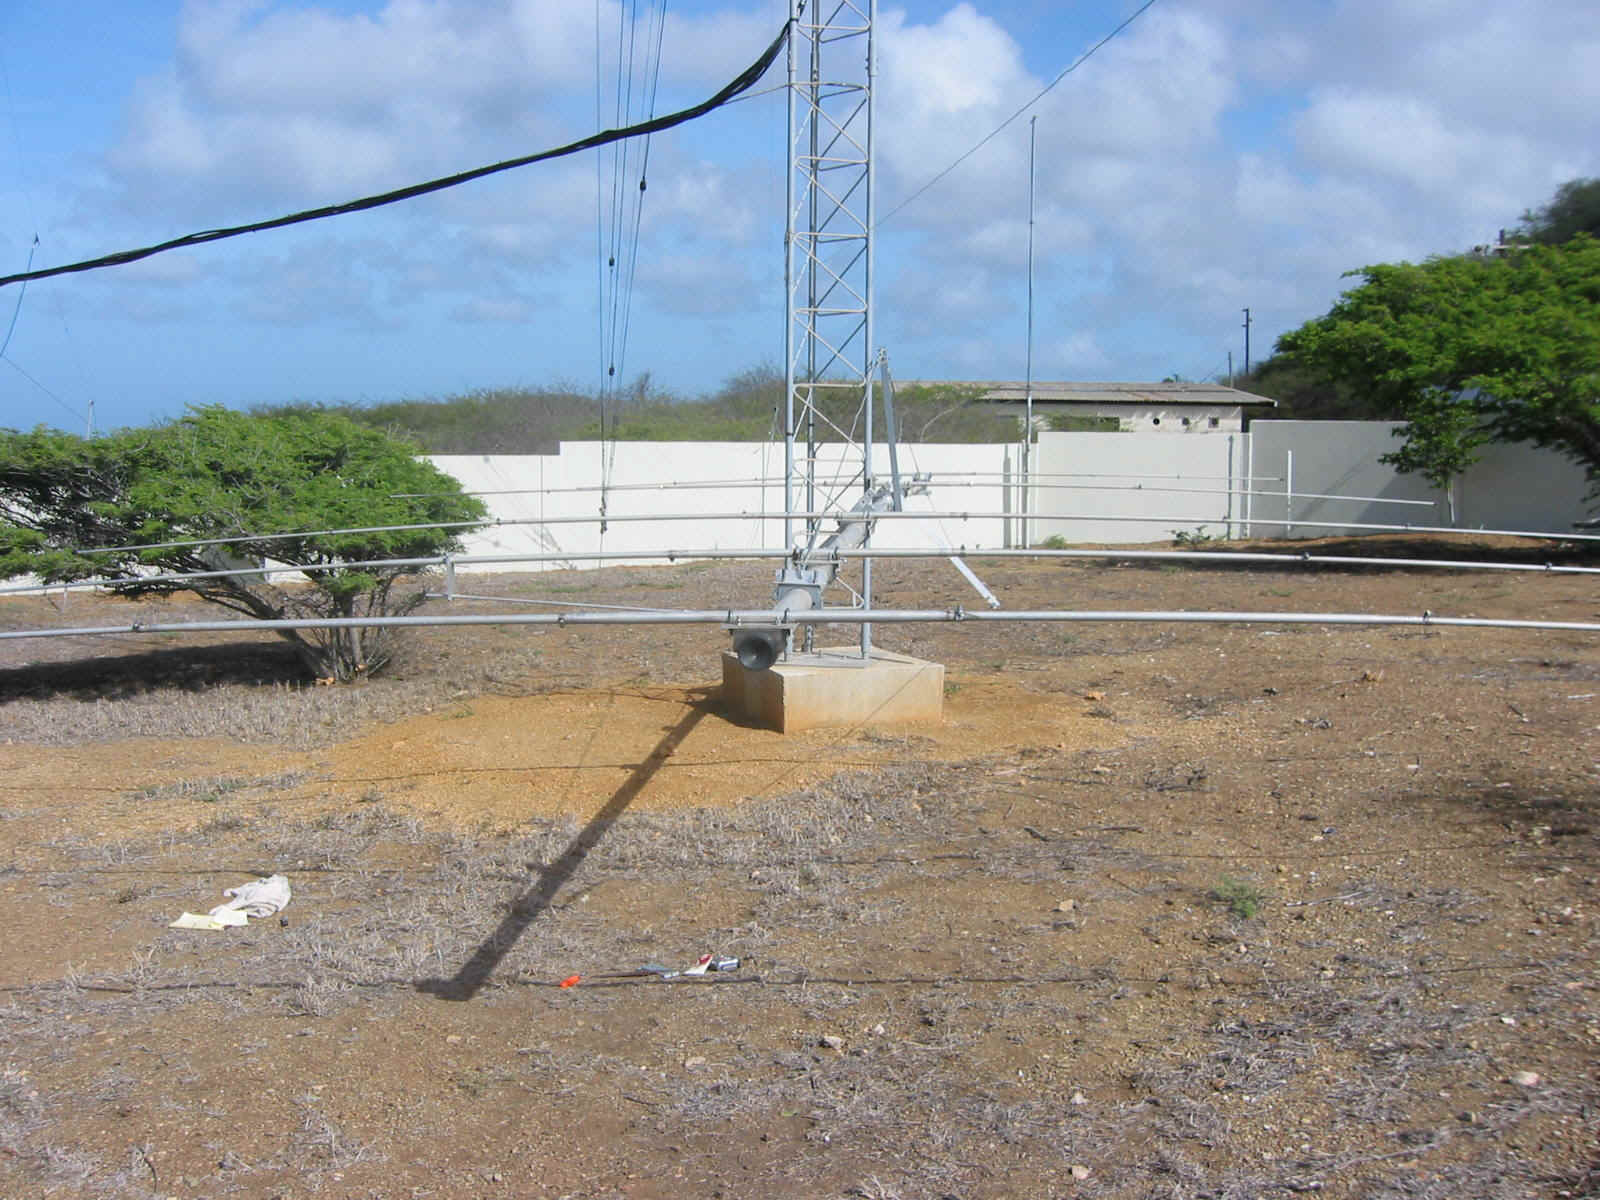 |
| Tuesday, July 10, 2007. Here's the antenna after being lowered to the roof terrace. We don't have any pictures of the takedown operation because all five of us were tremendously busy. This roof terrace was not built with antenna work in mind, but after we had it up it became obvious that it was a perfect place to bring down the US/JA 15 yagi. | 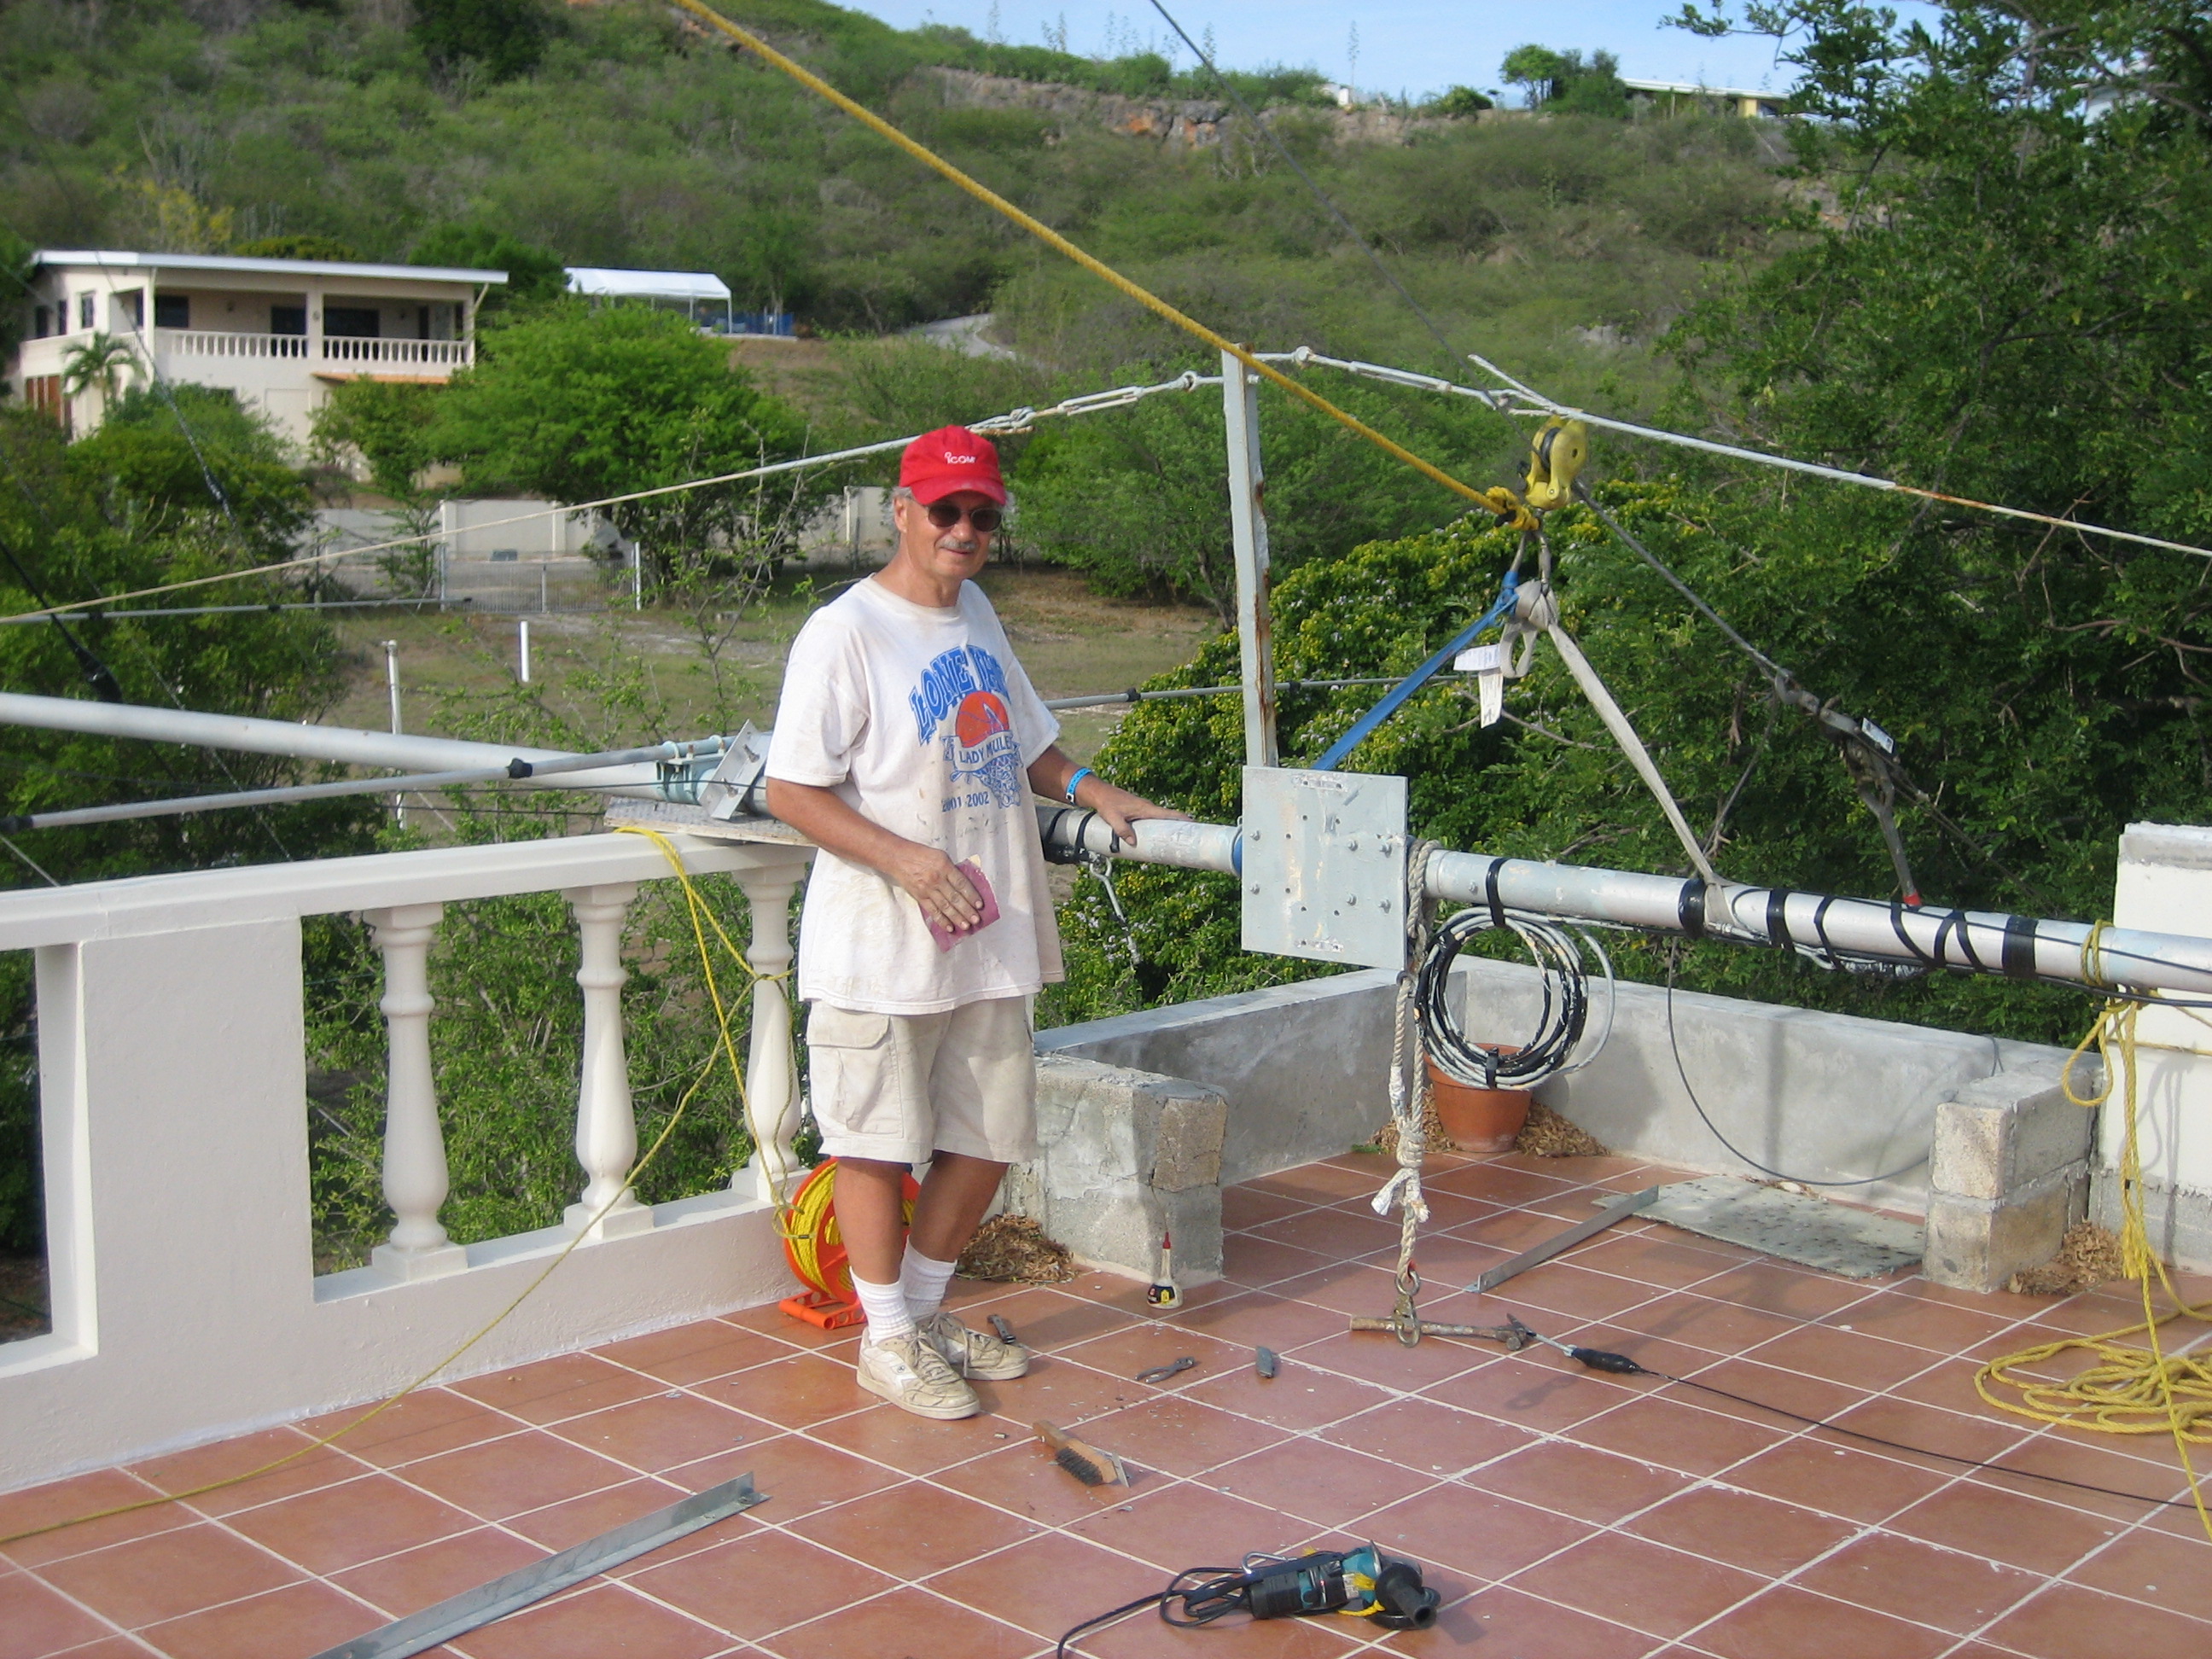 |
| Before. This is one of the element to boom clamp assemblies. You can see the heavy corrosion and salt buildup and the telltale sign of the failure of the epoxy paint -- it turns blue. | 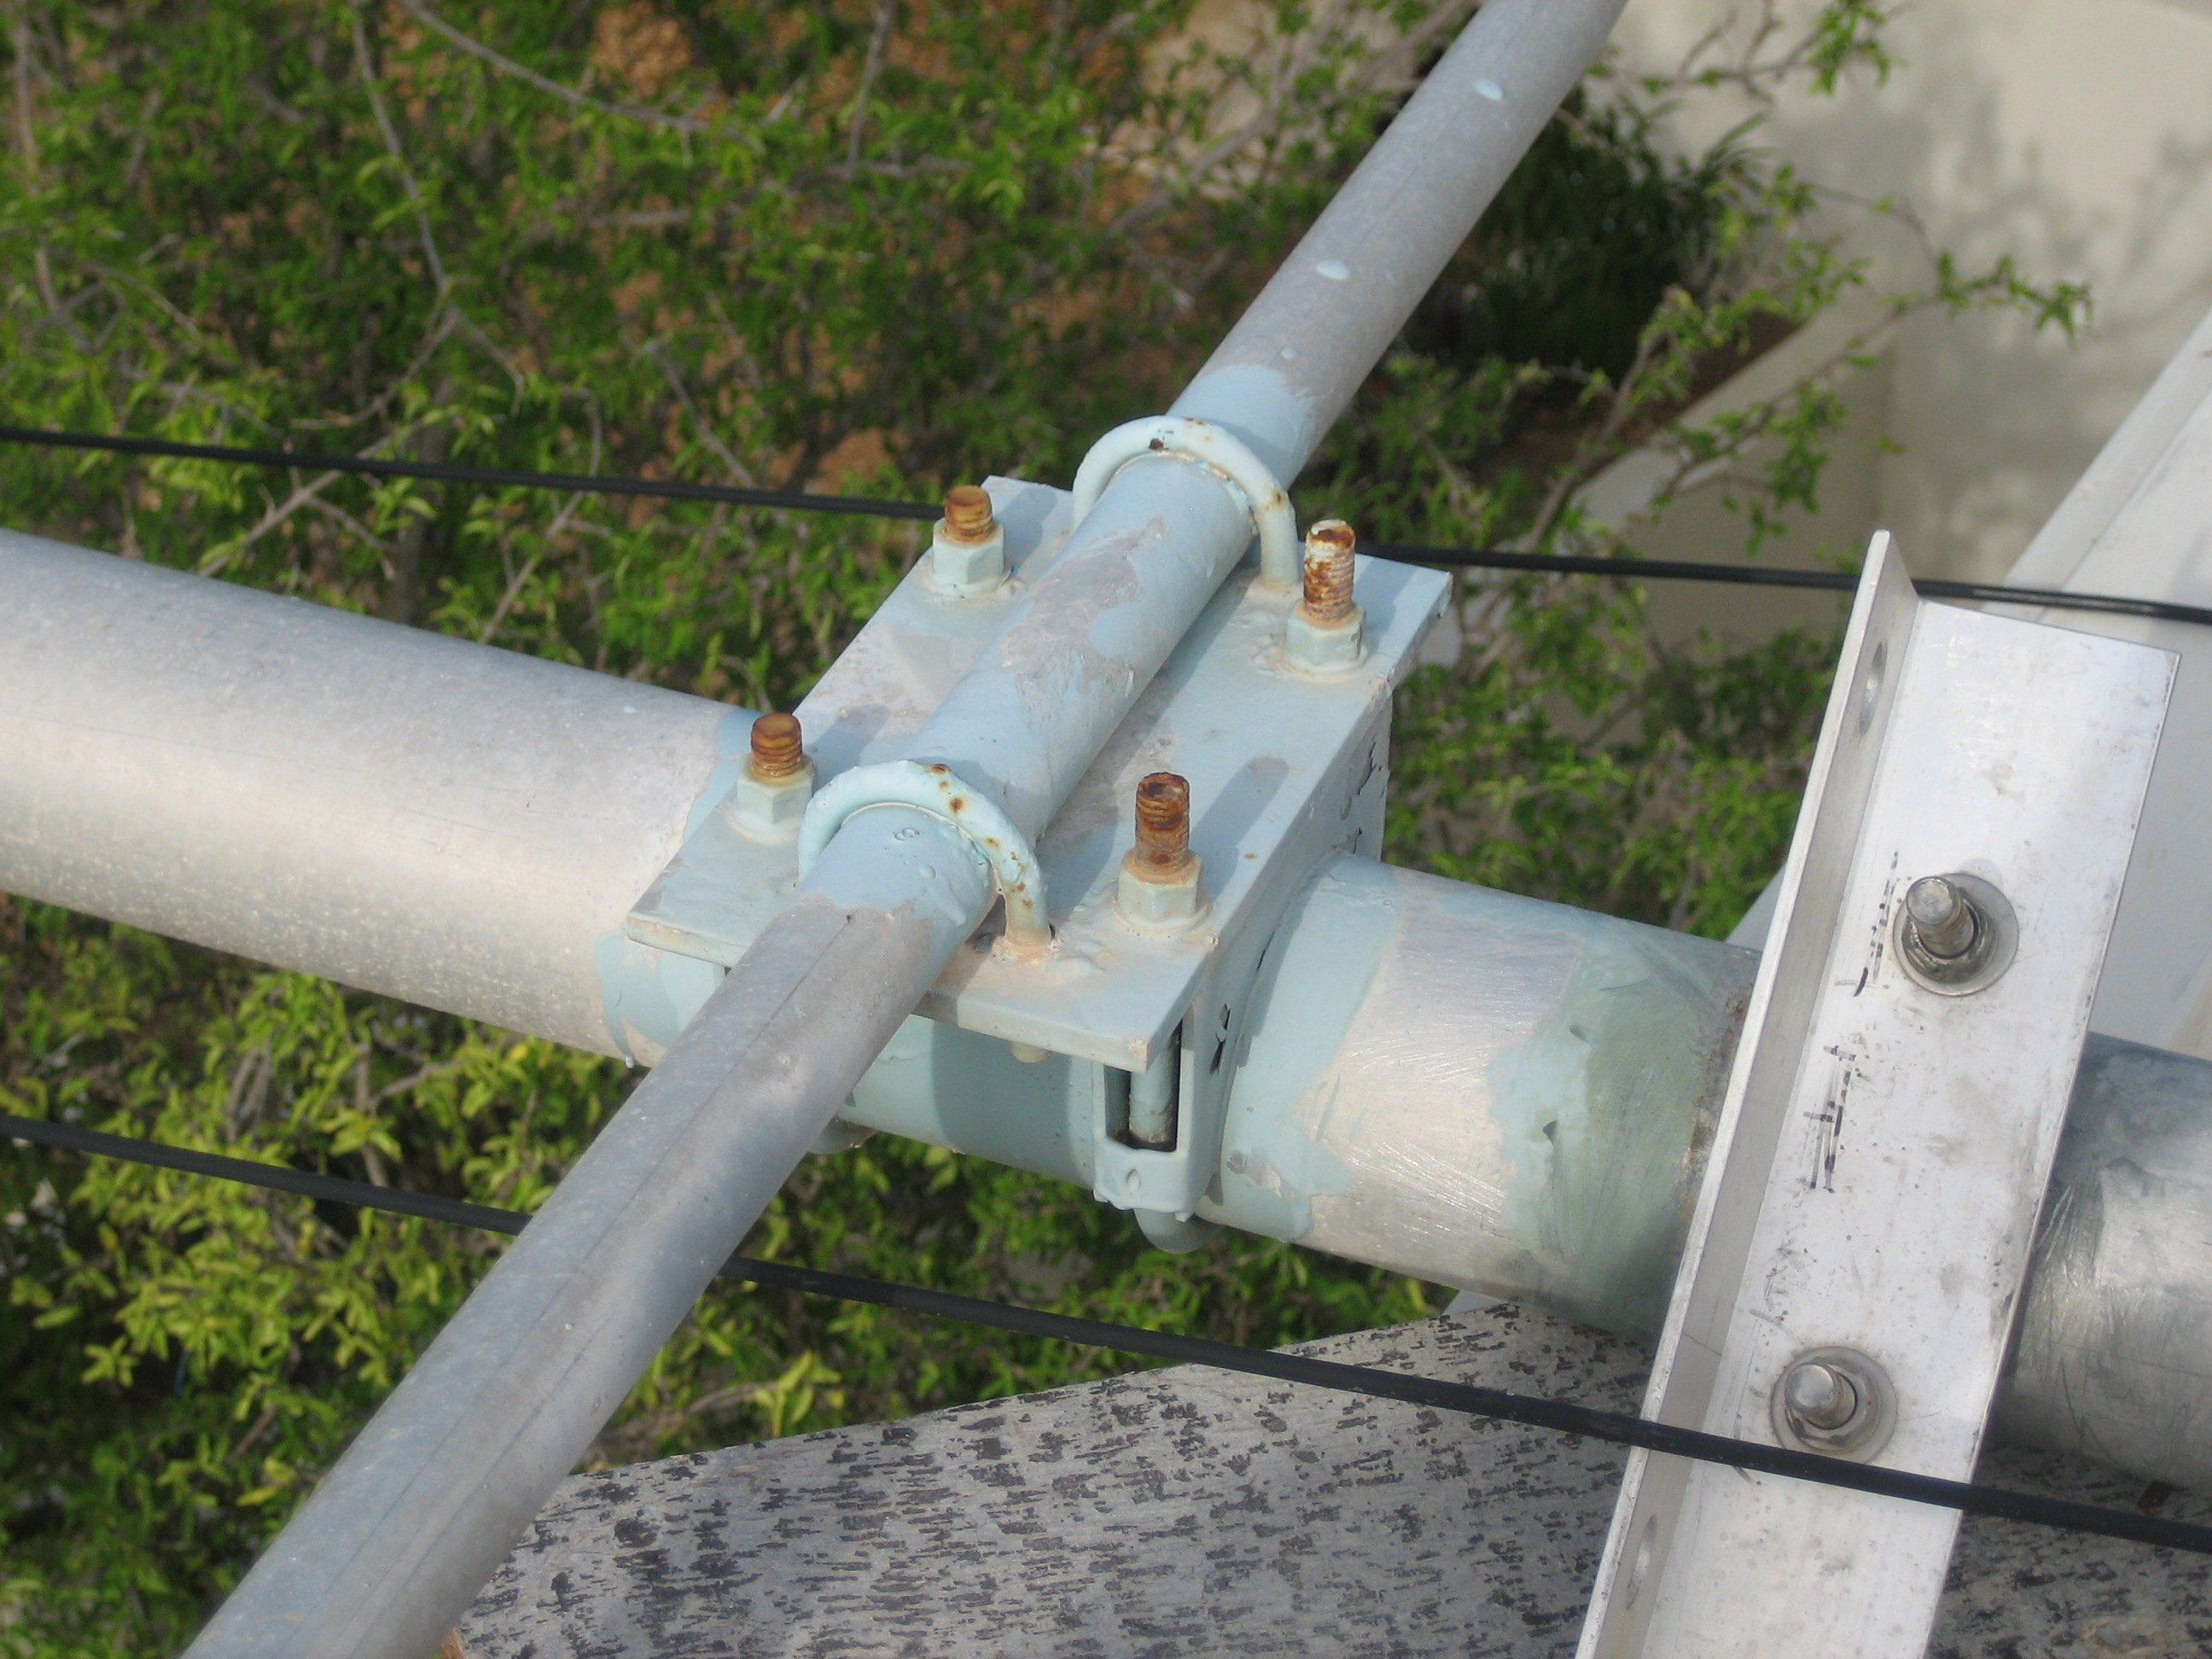 |
| After. A DJ8NK photo. This shows one of the renovated element clamps. The saddle clamps are all stainless and forged aluminum from DX Engineering. The boom and element plate were very extensively scraped, sanded, and then gooped with antioxidant. The threads are coated with Never Seize. This is absolute top quality hardware. | 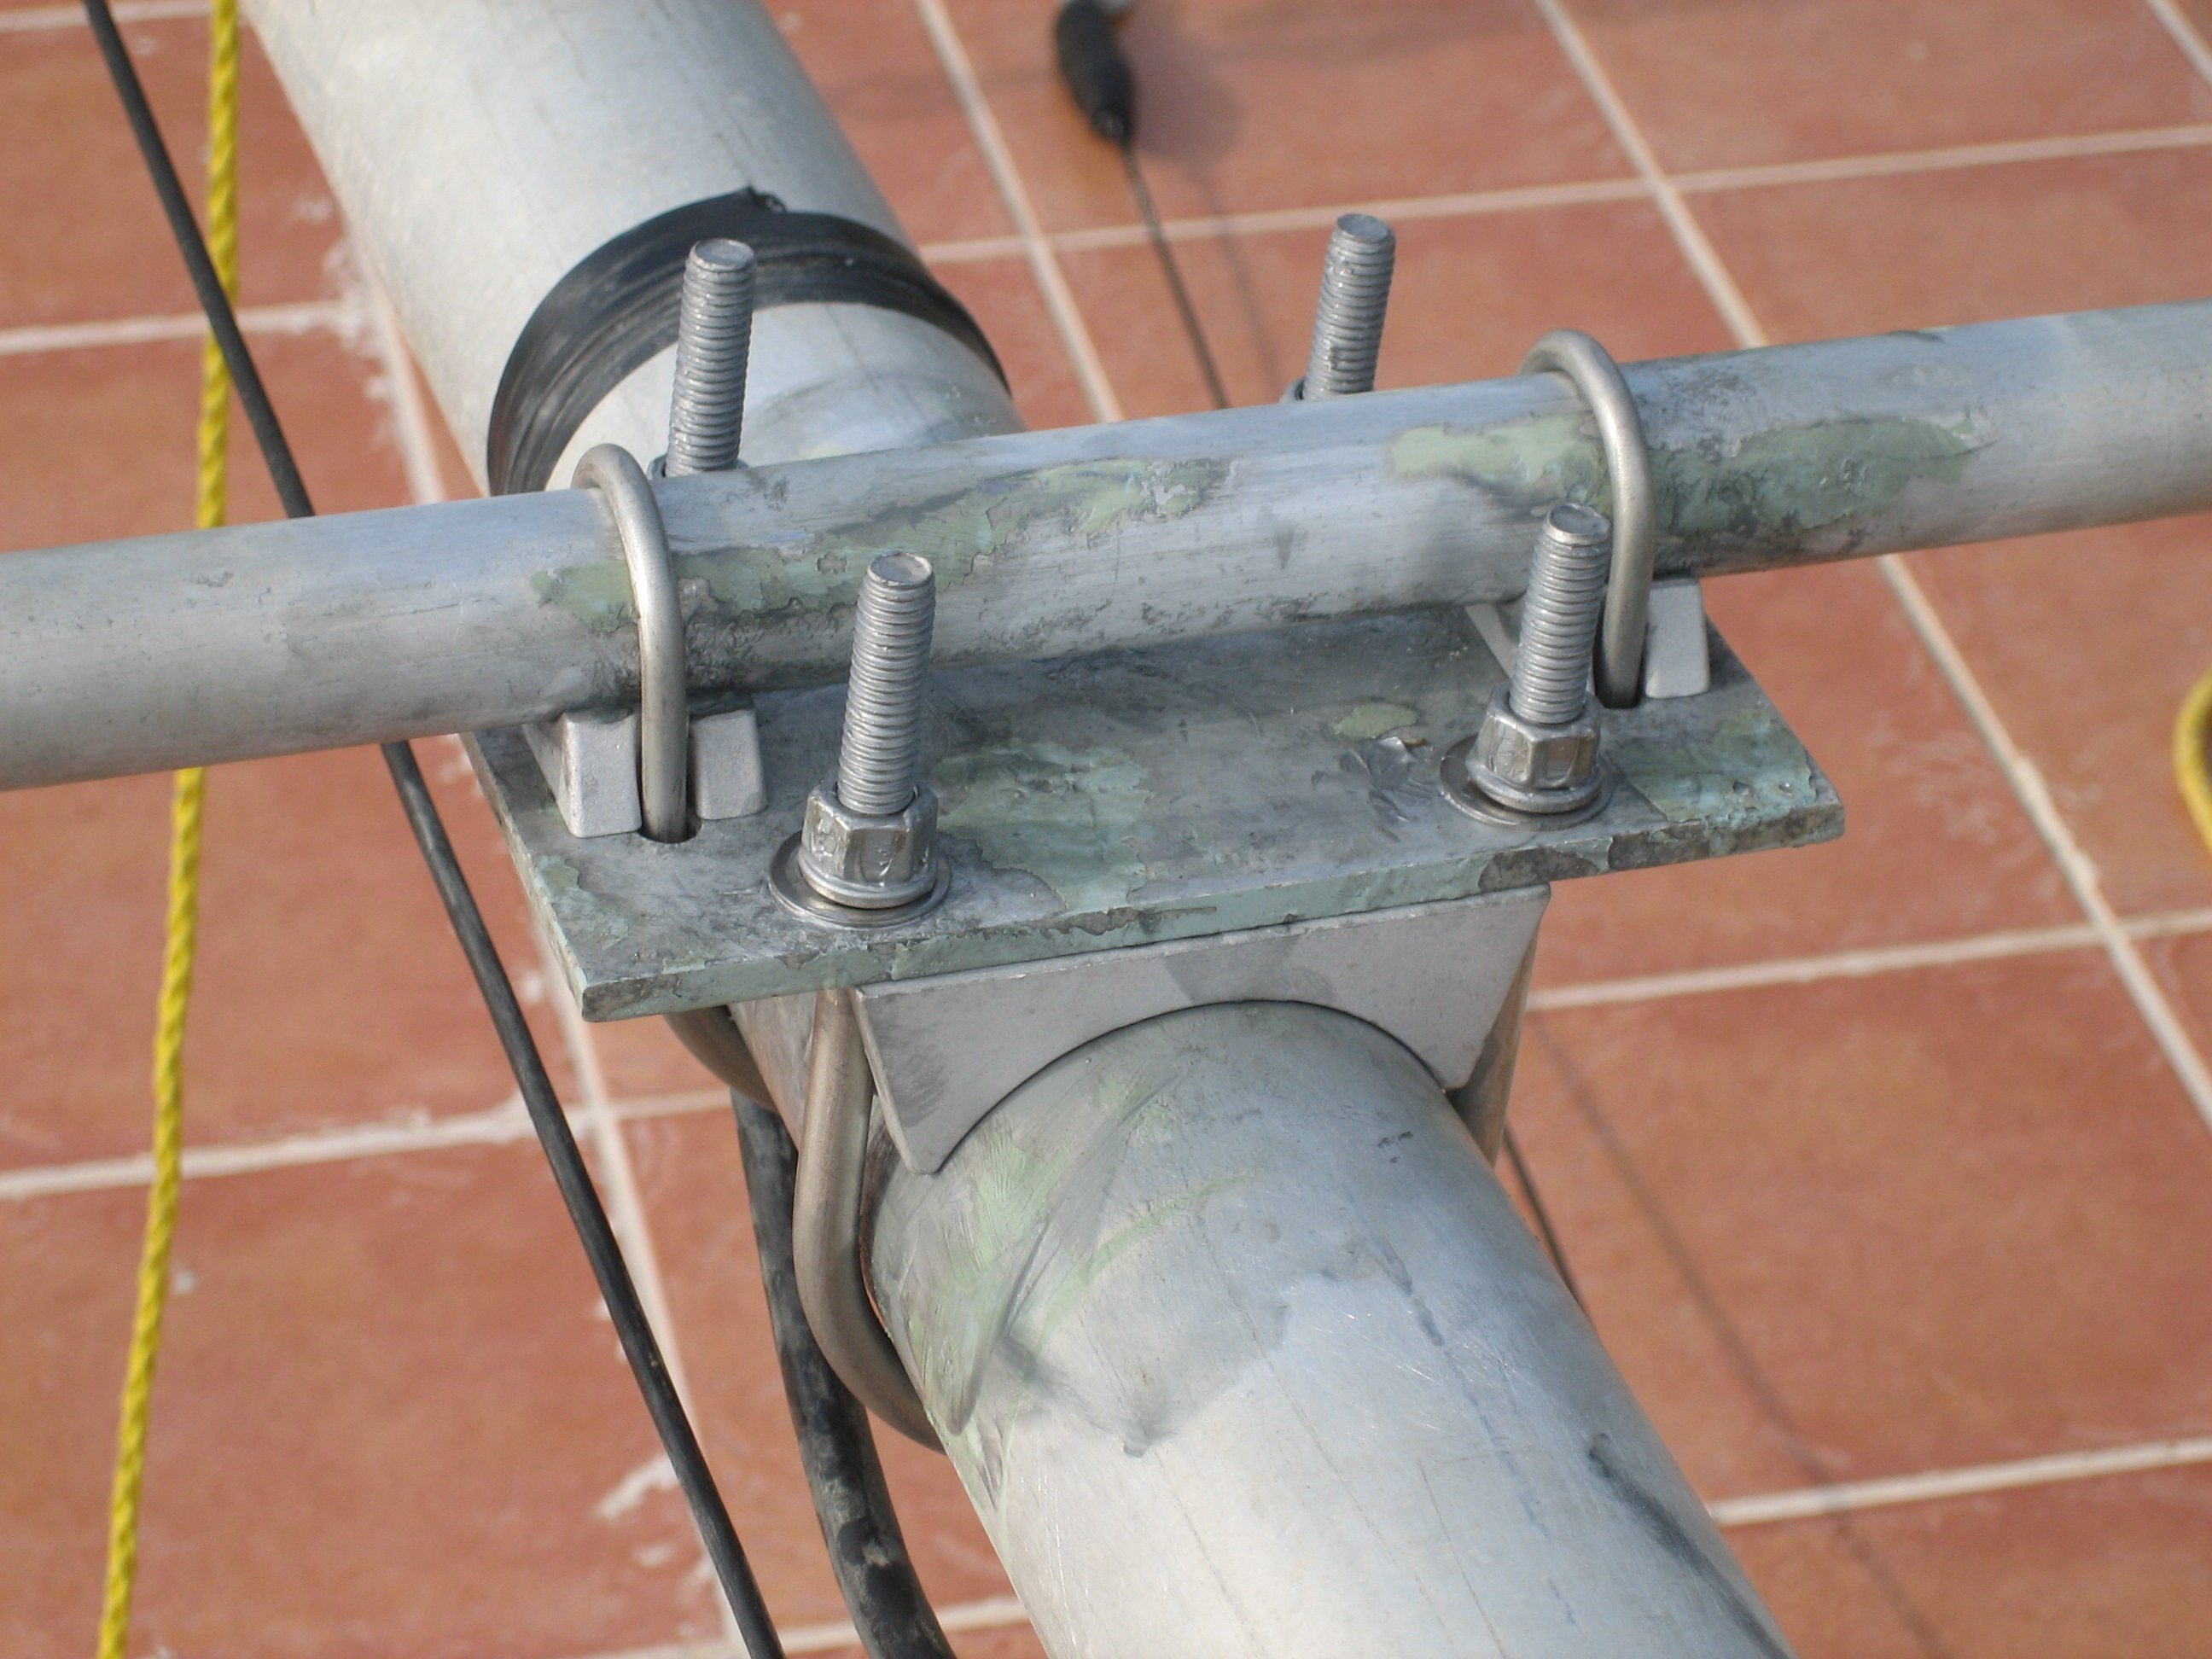 |
| After. An element plate after lots and lots of scraping and cleanup. | 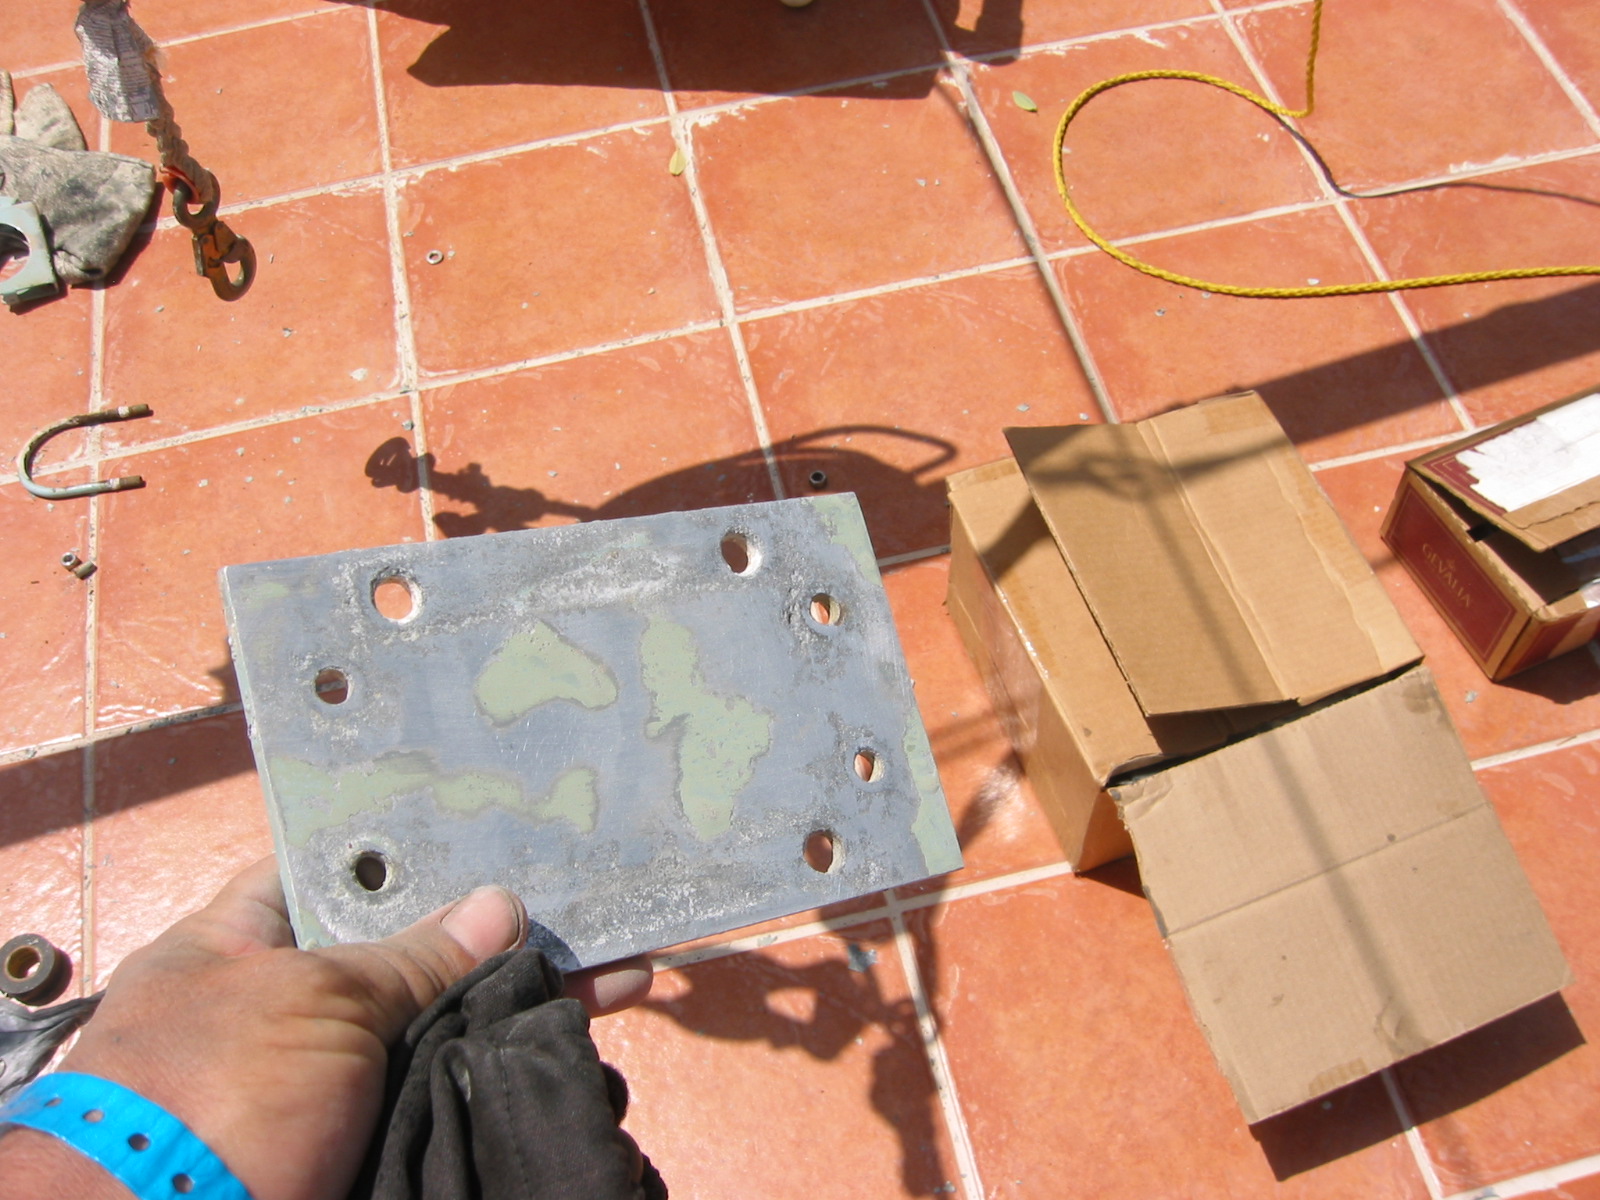 |
| Before. Badly corroded hardware at the rear attachment points for the overhead and lateral trusses. Note the delaminating saddle in contact with the boom, and the salt encrusted EHS deadend on the overhead support wire. | 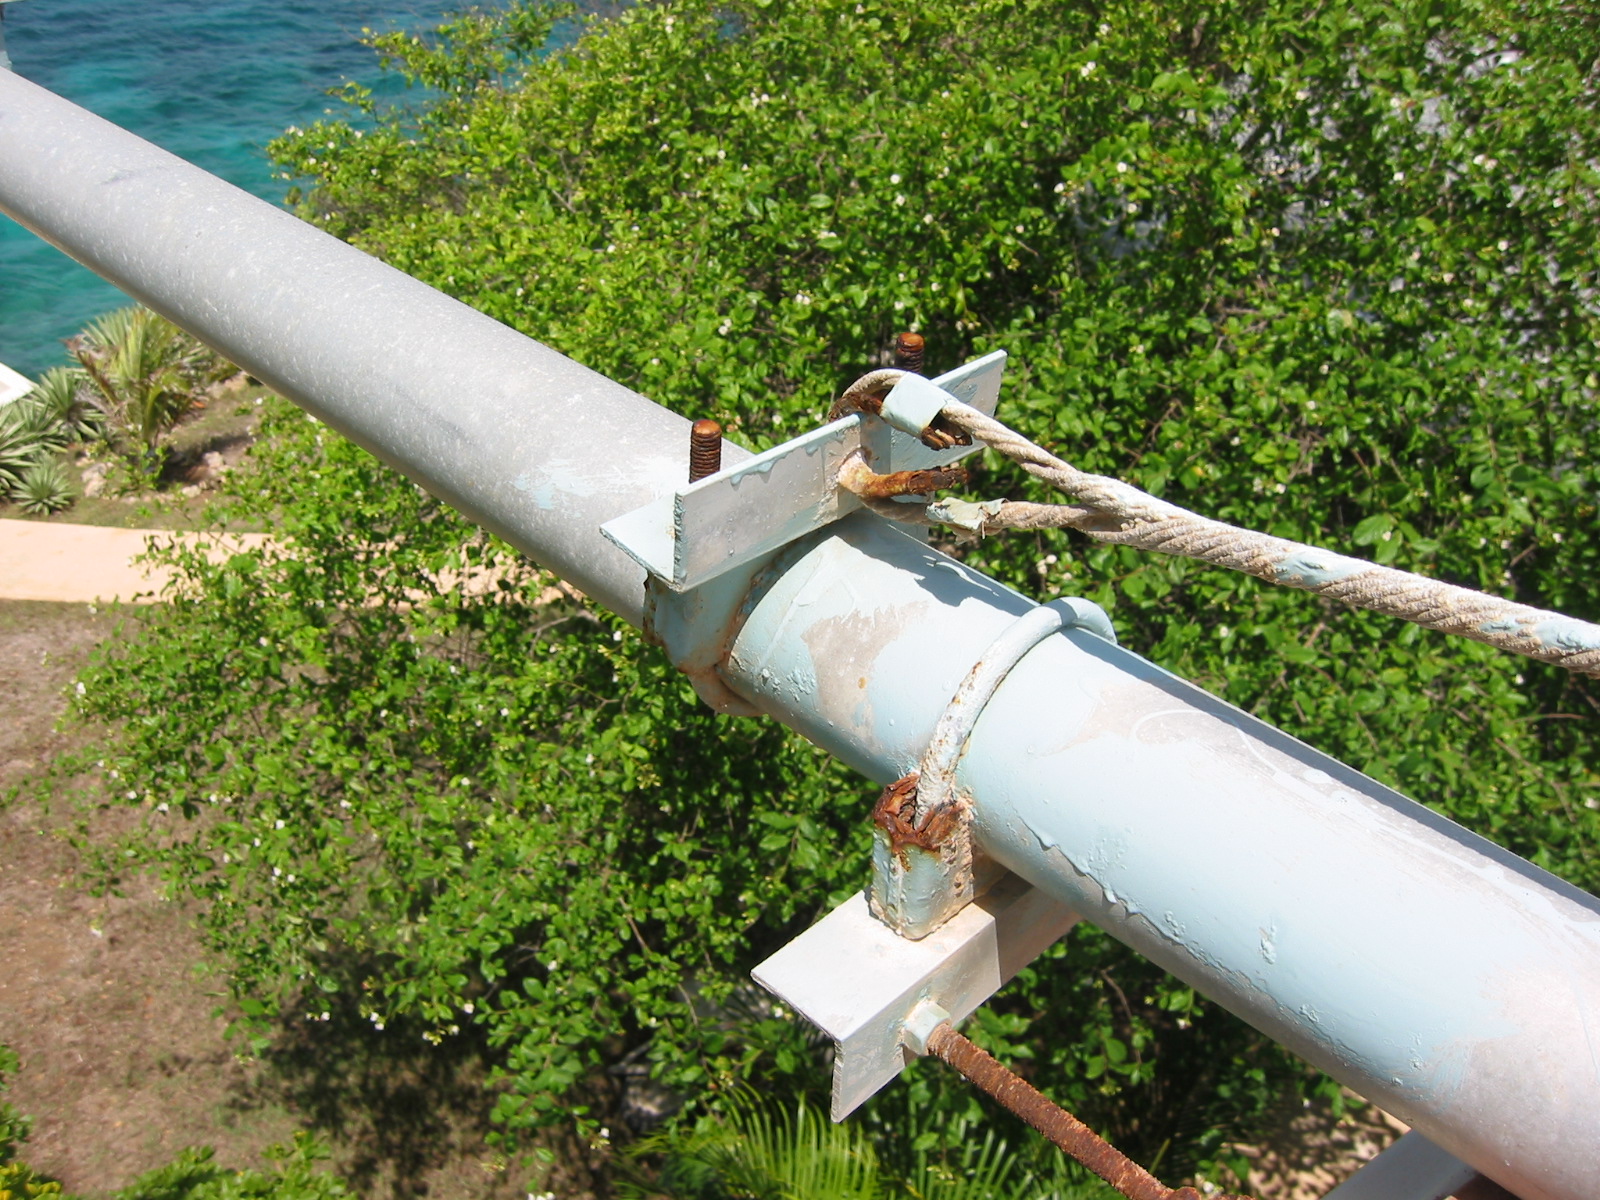 |
| This was a "rustproof" forged galvanized bolt at one of the lateral truss attachment points. This thing had four coats of epoxy on it before going up on the tower. | 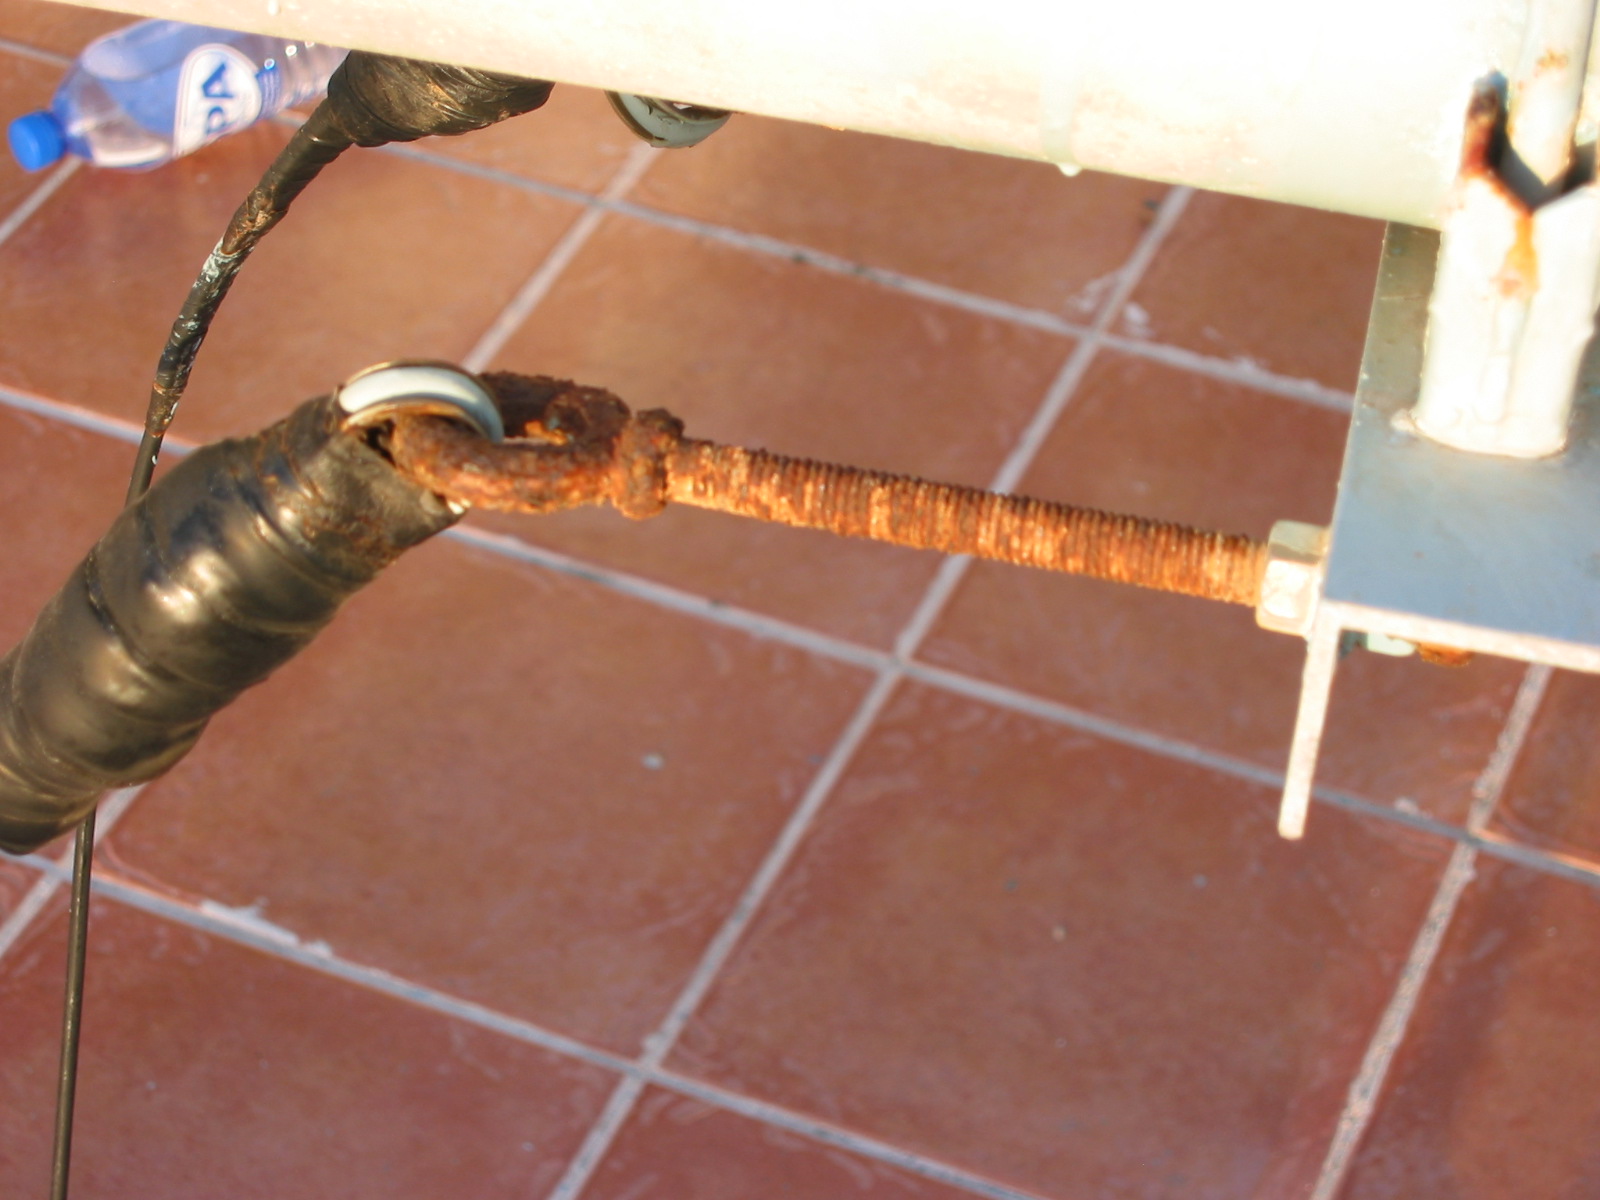 |
| Notice the rust-encrusted supposedly stainless steel thimble. |  |
| The initial resting position. I renovated everything that I could reach, then we had to heft the antenna up and move it several meters toward the ocean to be able to reach the front two elements. | 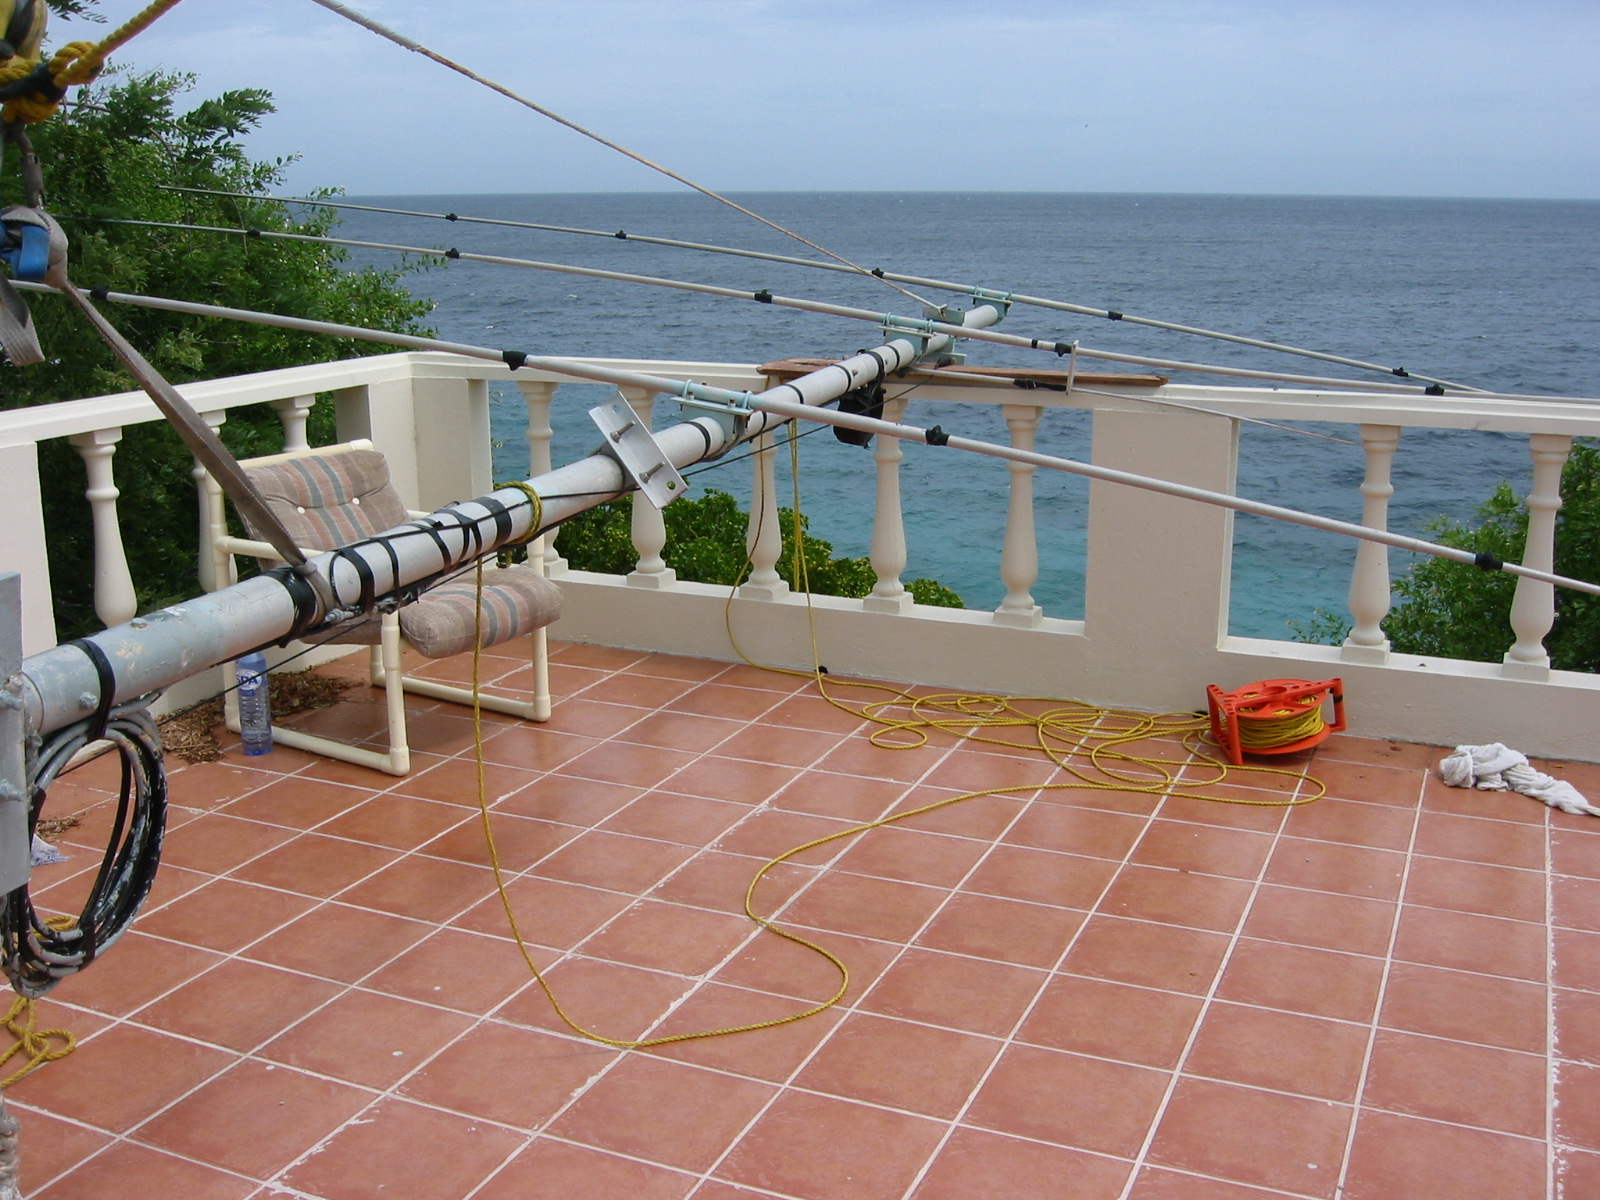 |
| Boom corrosion after removal of the 3rd director. | 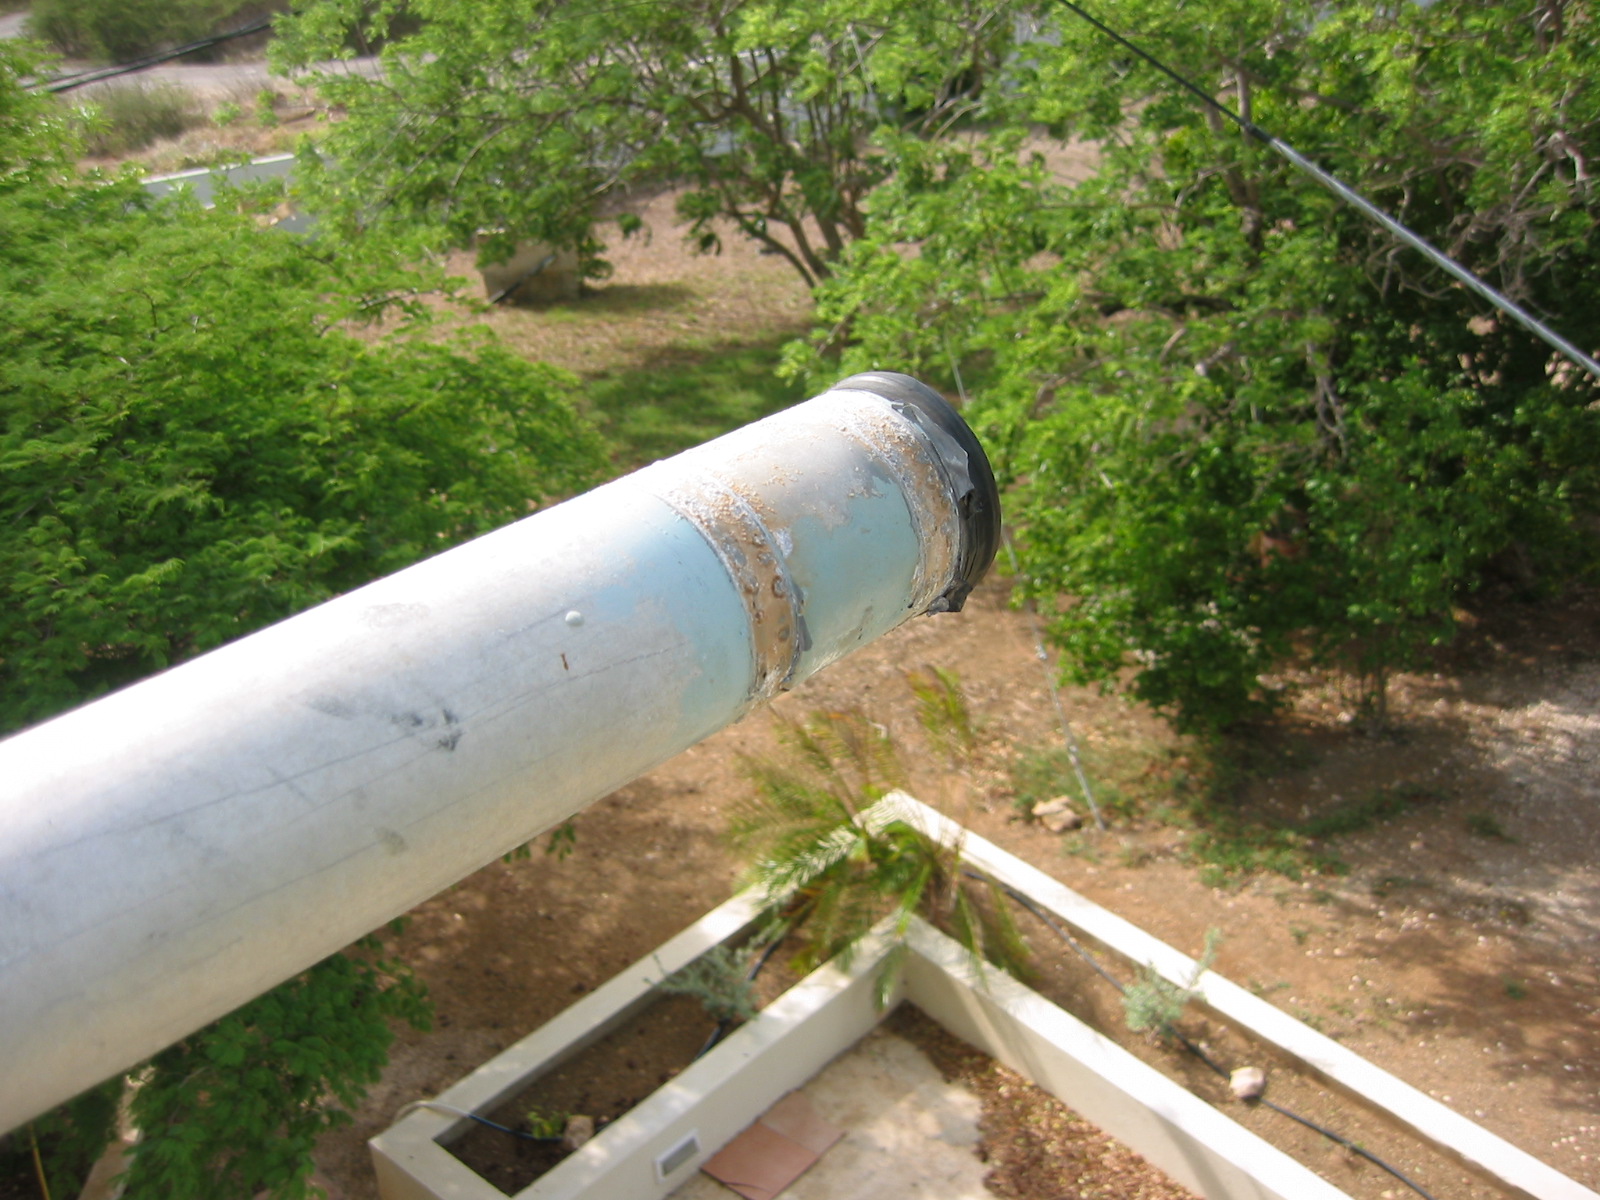 |
| Here's how nice a typical element to boom attachment location looked after scraping and sanding the boom. | 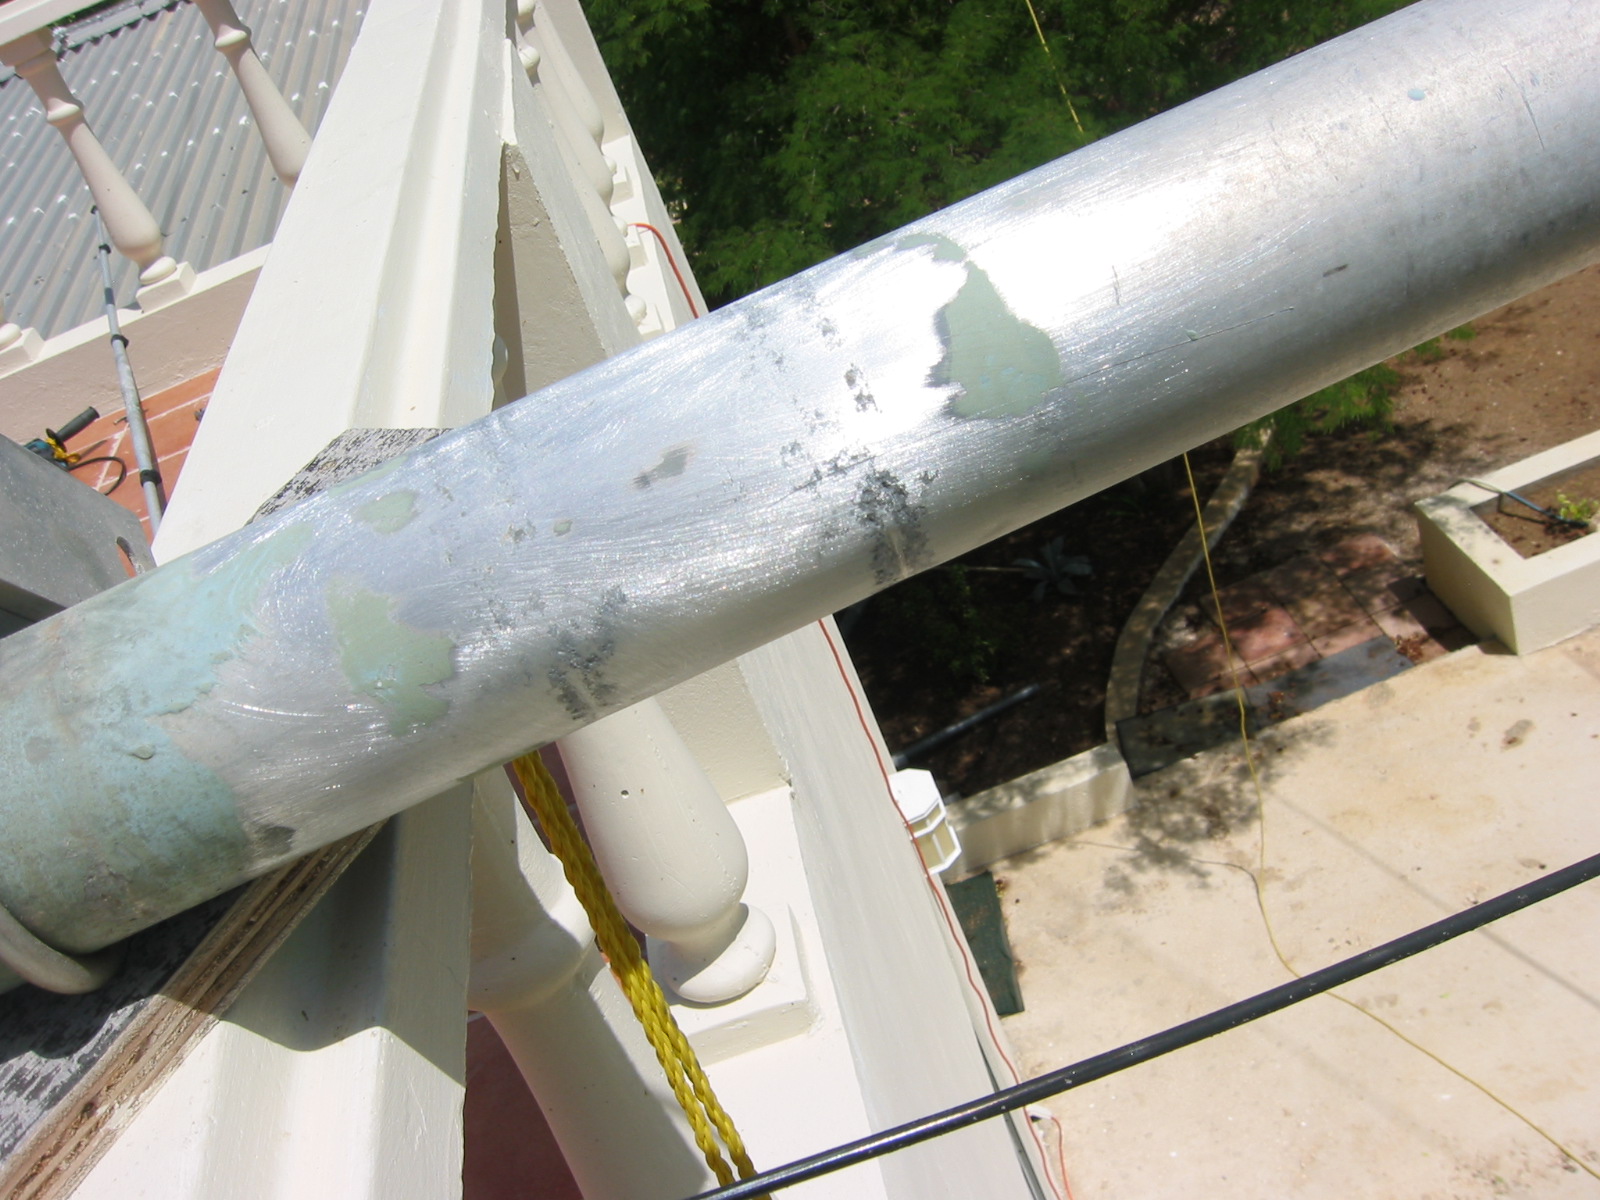 |
| A few of the bad components in the trash pile the first day. Nearly all of these had to be cut off with the electric grinder. | 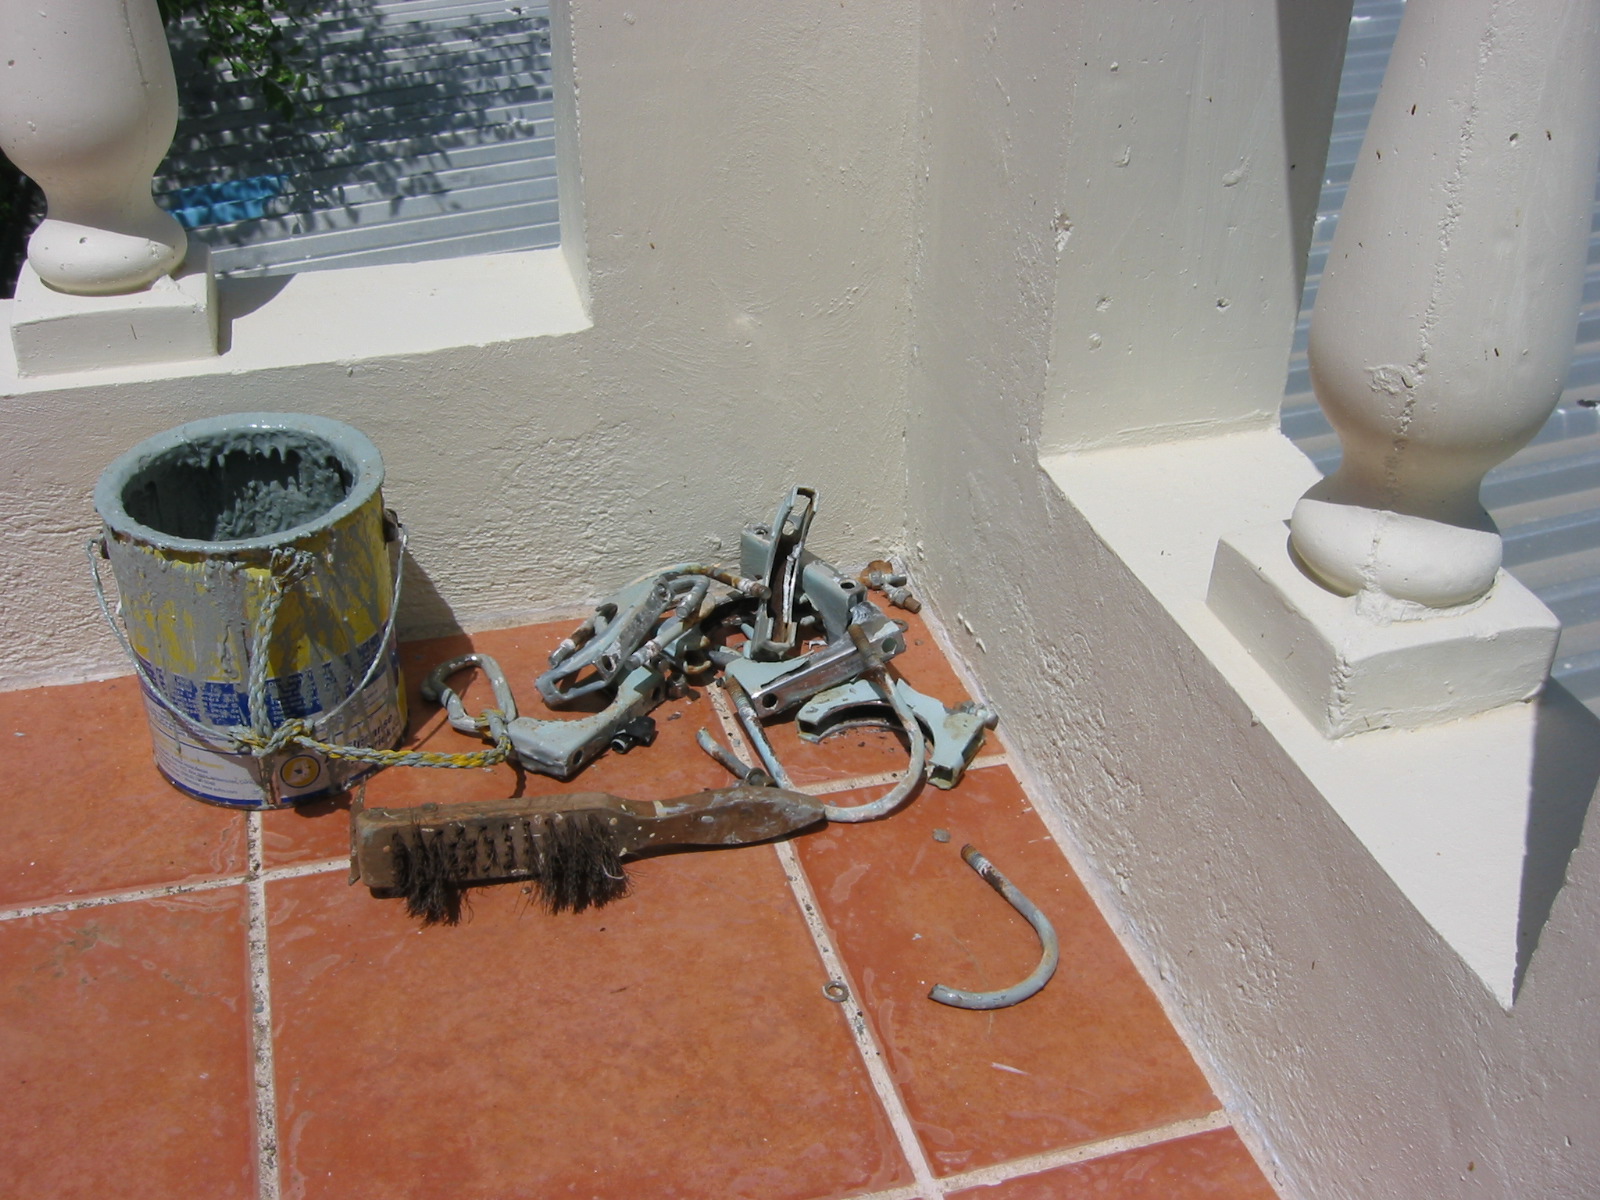 |
| Part of the tower mounting plate with the new hardware and a lot of antioxidant in place. | 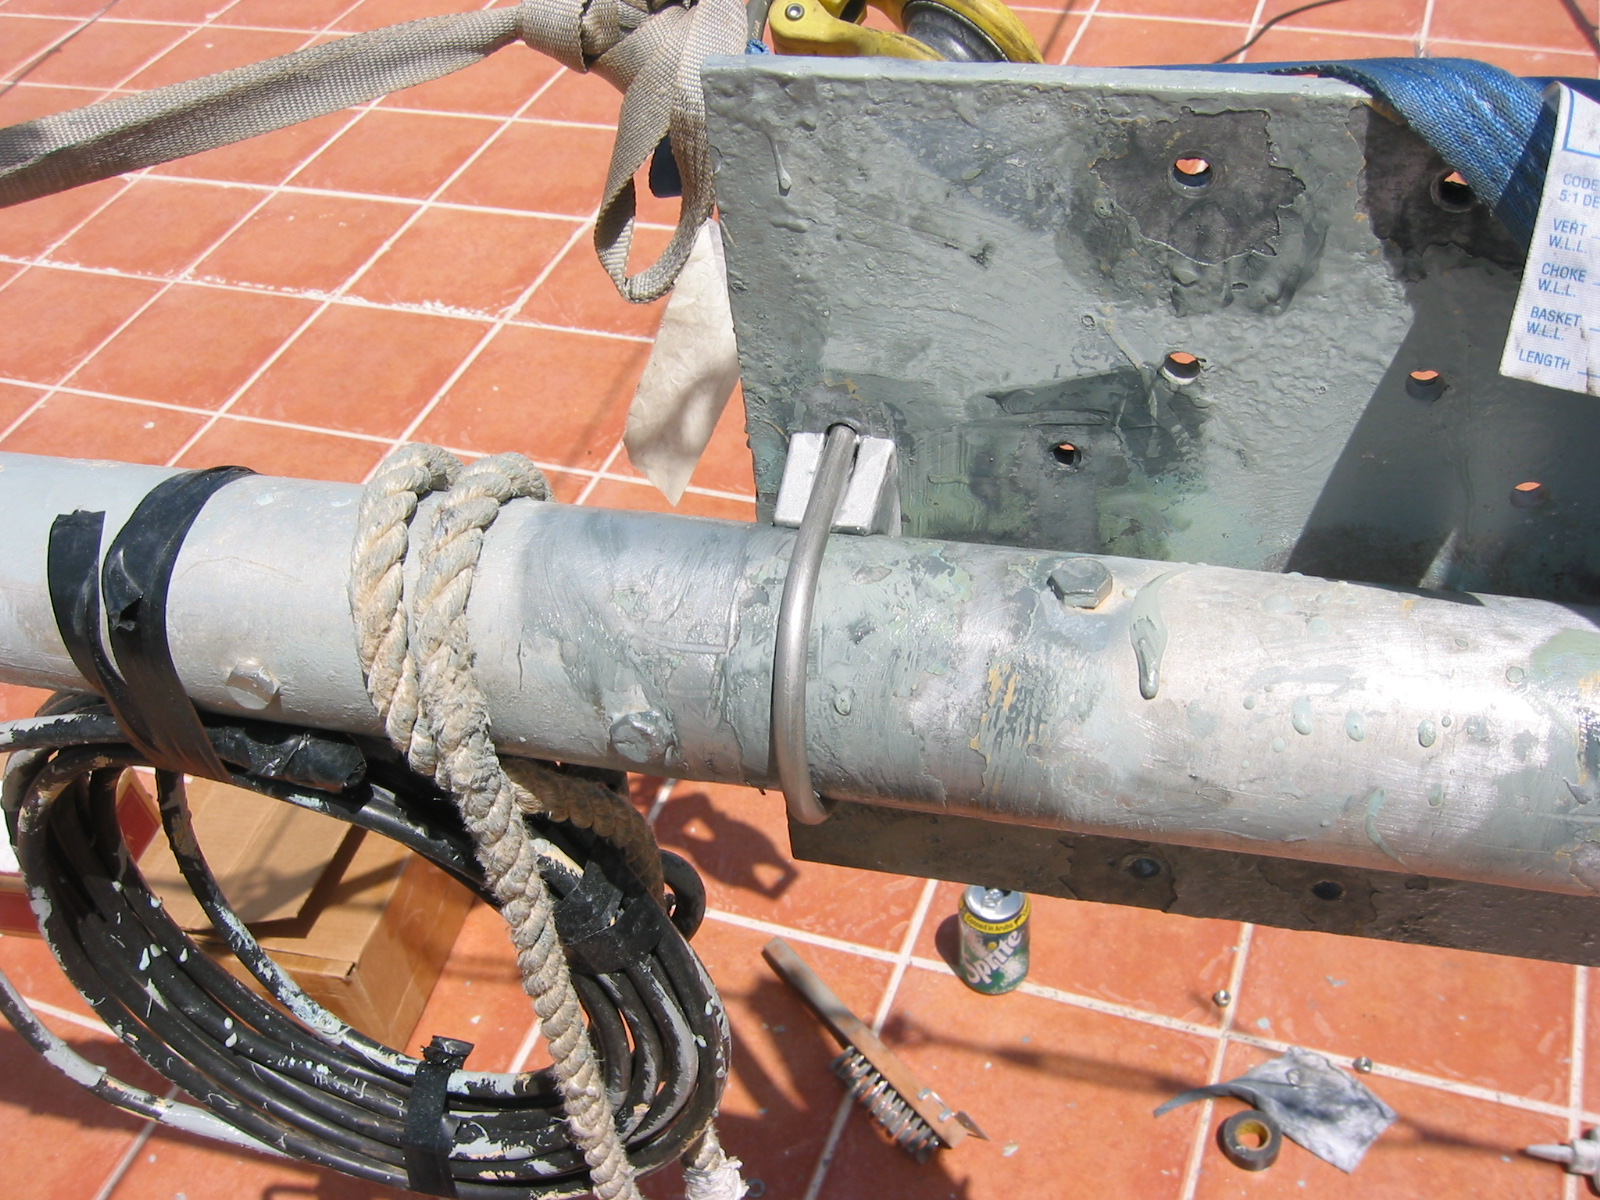 |
| After. The 1st director with all new, beautiful hardware. | 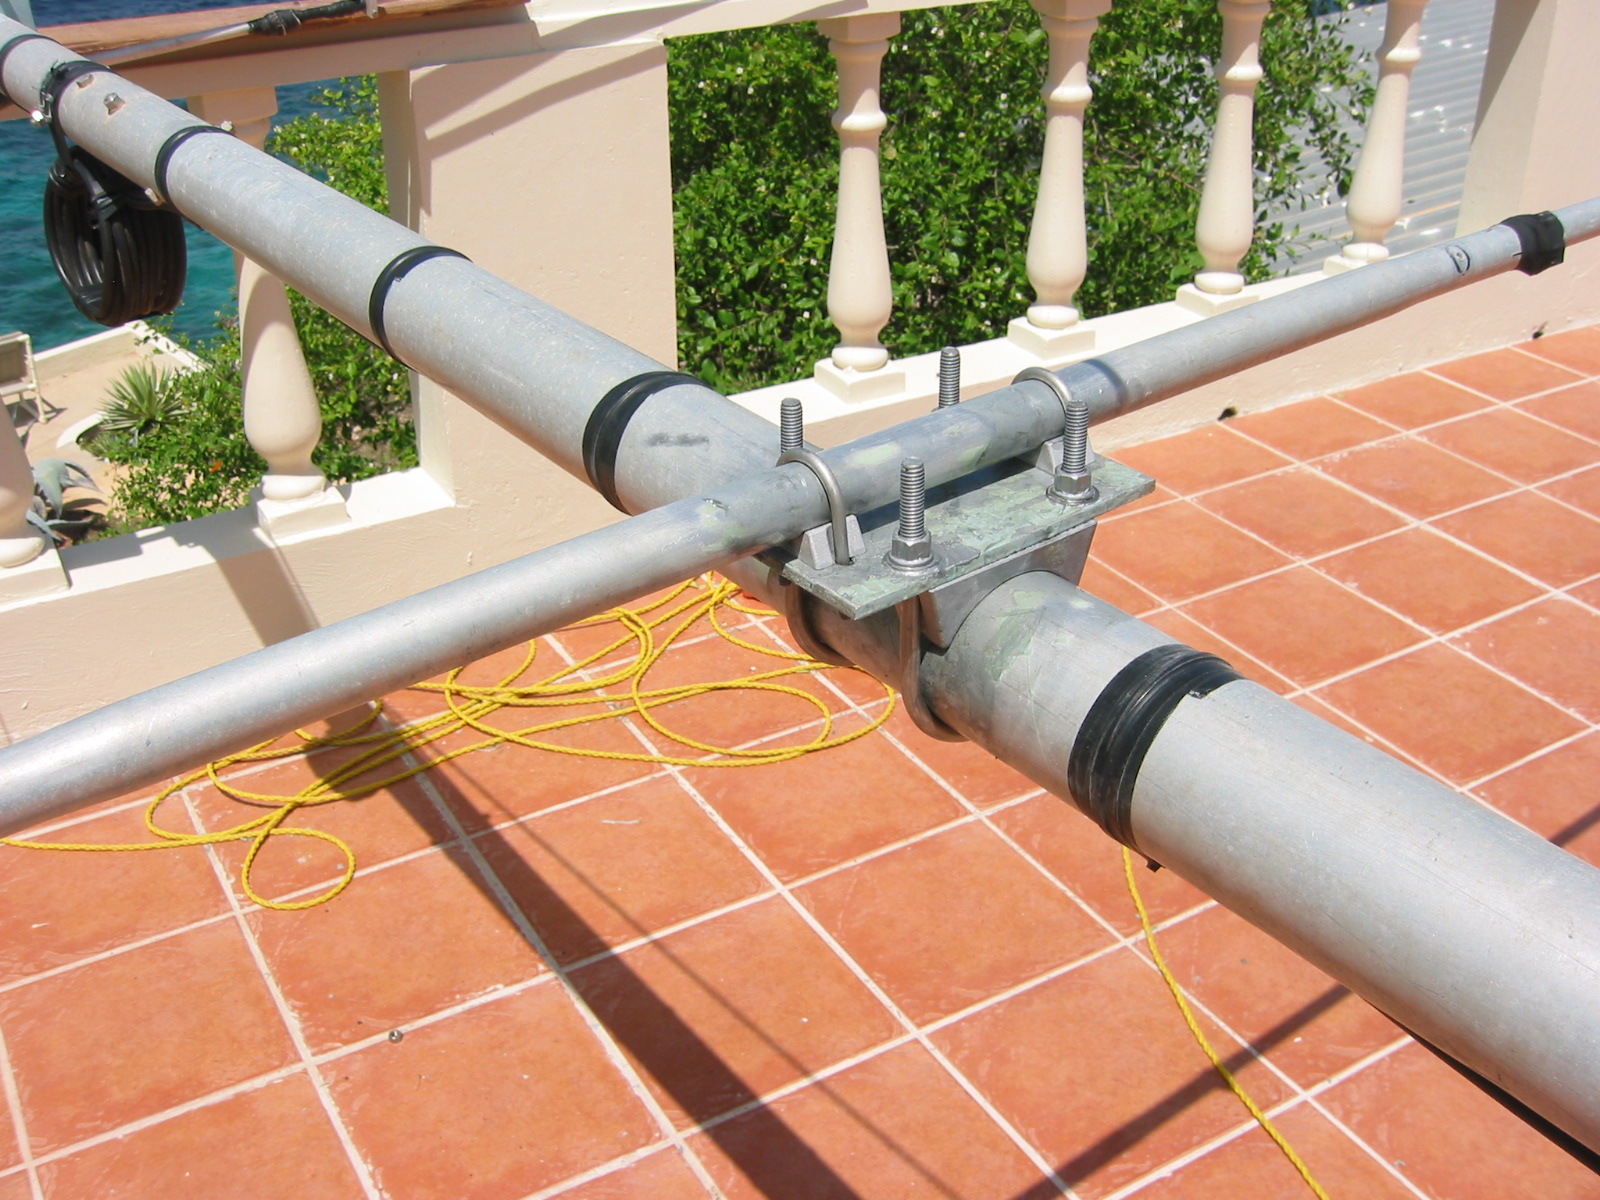 |
| The driven element and balun after renovation. Note the rusty parts on the back of the antenna which haven't been removed yet. The hanging Phillystran pieces are for the lateral boom guys. All of these parts were subsequently replaced with new Phillystran and attachment components. |  |
| Here's the front truss attachment point, with the steel overhead replaced by Phillystran. All brackets and saddle clamps are also new. You can see the labeling N8LGP and I put on the parts when he made them in his garage in August 2006. This was necessary to keep straight all the huge quantity of stuff he made to rebuild five entire yagis. The black globs are tape-coated duct seal that protects the Philly wire clips. | 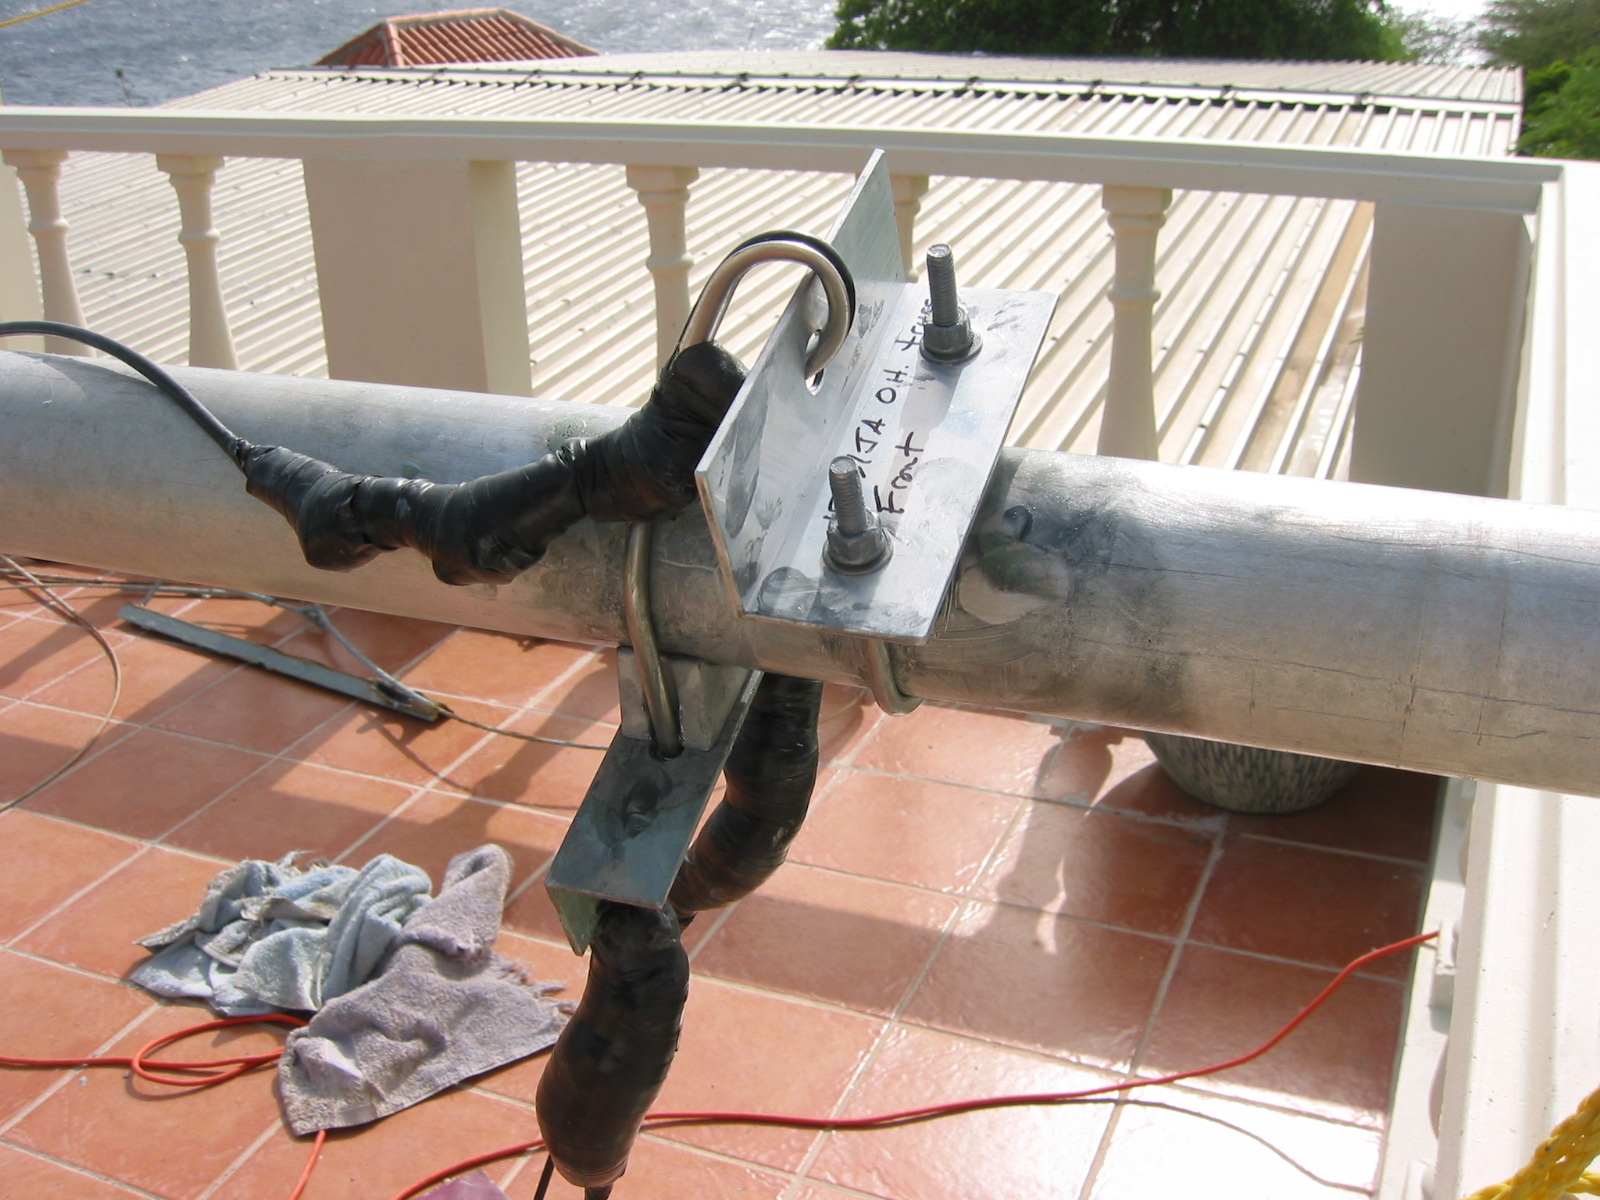 |
| Oxidation on one of the truss brackets. These are aluminum, so I was able to clean these up and reuse them. It required a lot of scraping and sanding, however, to do so. | 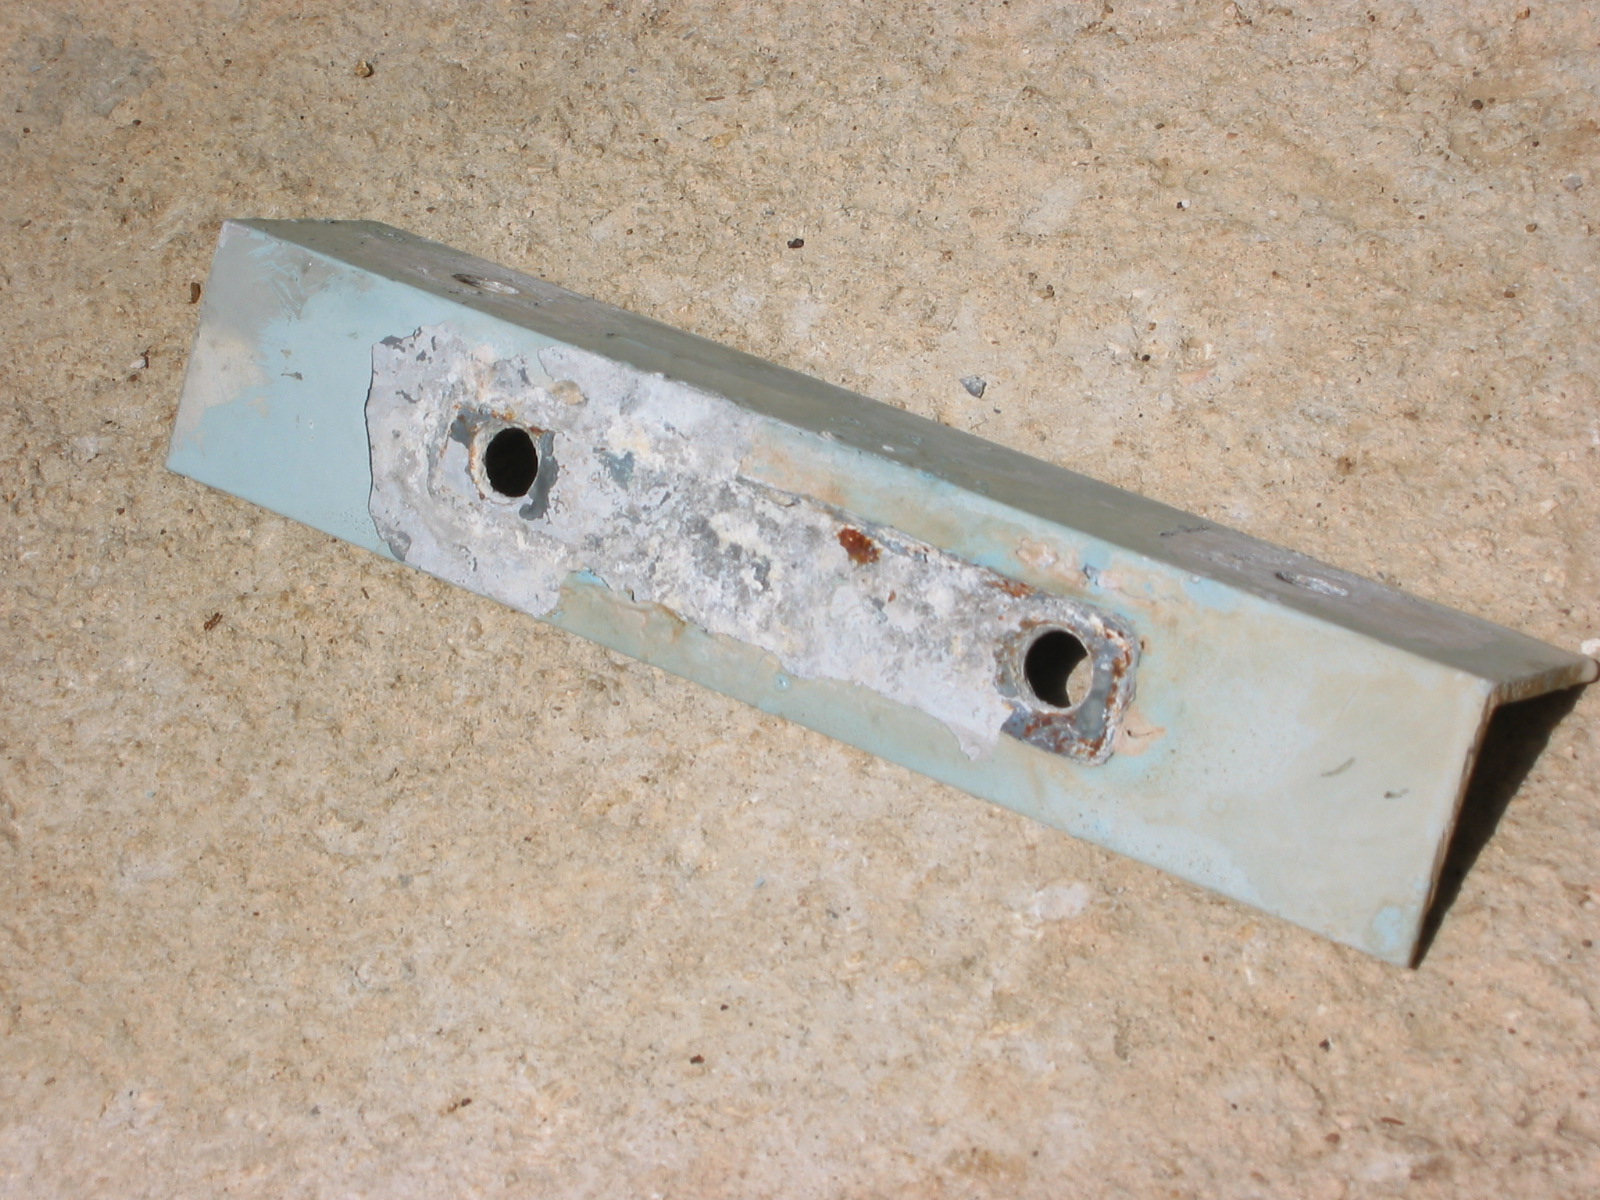 |
| This is a bit shaky, with most of the weight of the antenna hanging over the edge so I could reach the front element. I had to tie down the boom in the front to keep it from falling off the roof. | 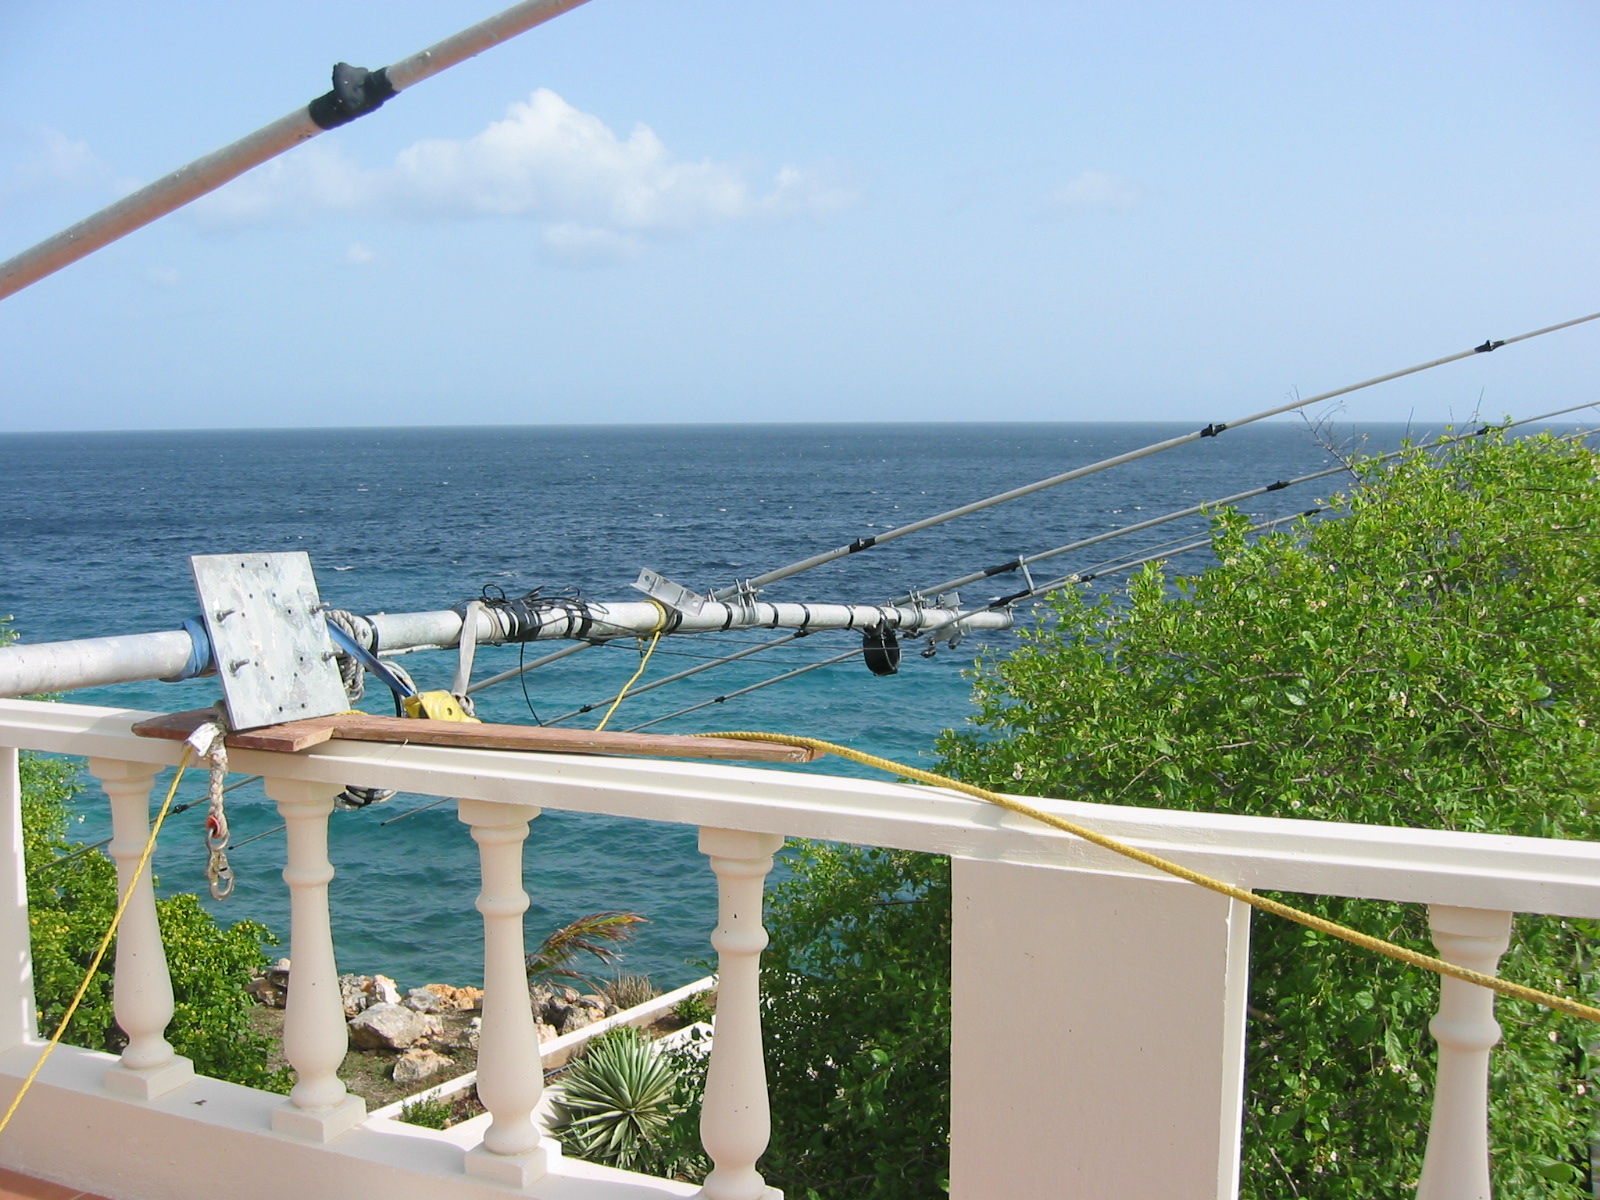 |
| From here back the renovation is complete. You can see the three truss lines (Phillystran) taped to the boom awaiting reconnection on the tower. I eliminated the vertical truss support at the center of the boom, instead attaching the overhead truss Phillystran directly to the tower with a stainless spring clip and a turnbuckle. This makes it very easy to truss up the antenna and eliminates a lot of components. The turnbuckle and clip were buried in duct seal and tape after installation. | 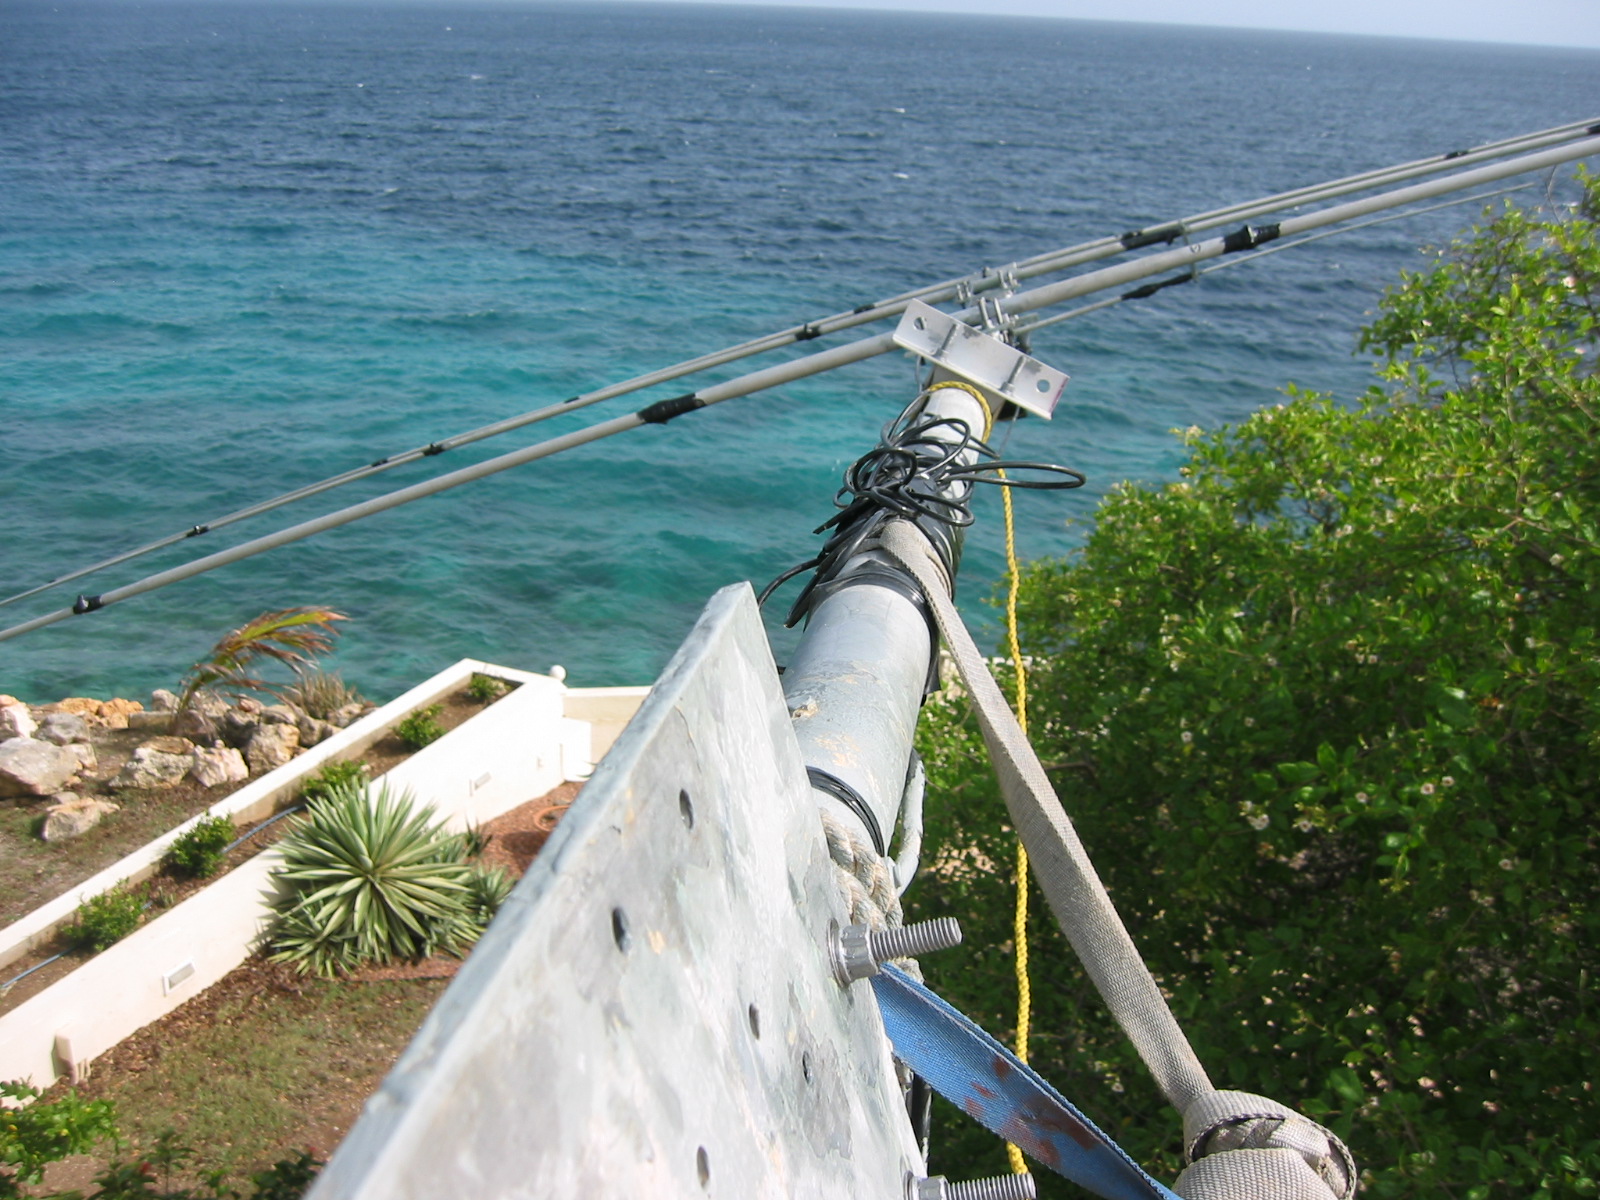 |
| Lots of parts and tools spread out on the roof terrace. This renovation took from mid-day Tuesday until about noon Friday, three of the hardest days of work I have ever done. The hardware was all frozen, so what I could not cut off had to be muscled off. And the sun on this roof is unbelievable. Not to whine, but this was VERY difficult work, some 10 hours each day. I was at the point of max discouragement Thursday morning when it rained and I lost a few hours of work, feeling the pressure to get this antenna back up for the contest on Saturday. By 11 it was sunny and dry again and work continued. | 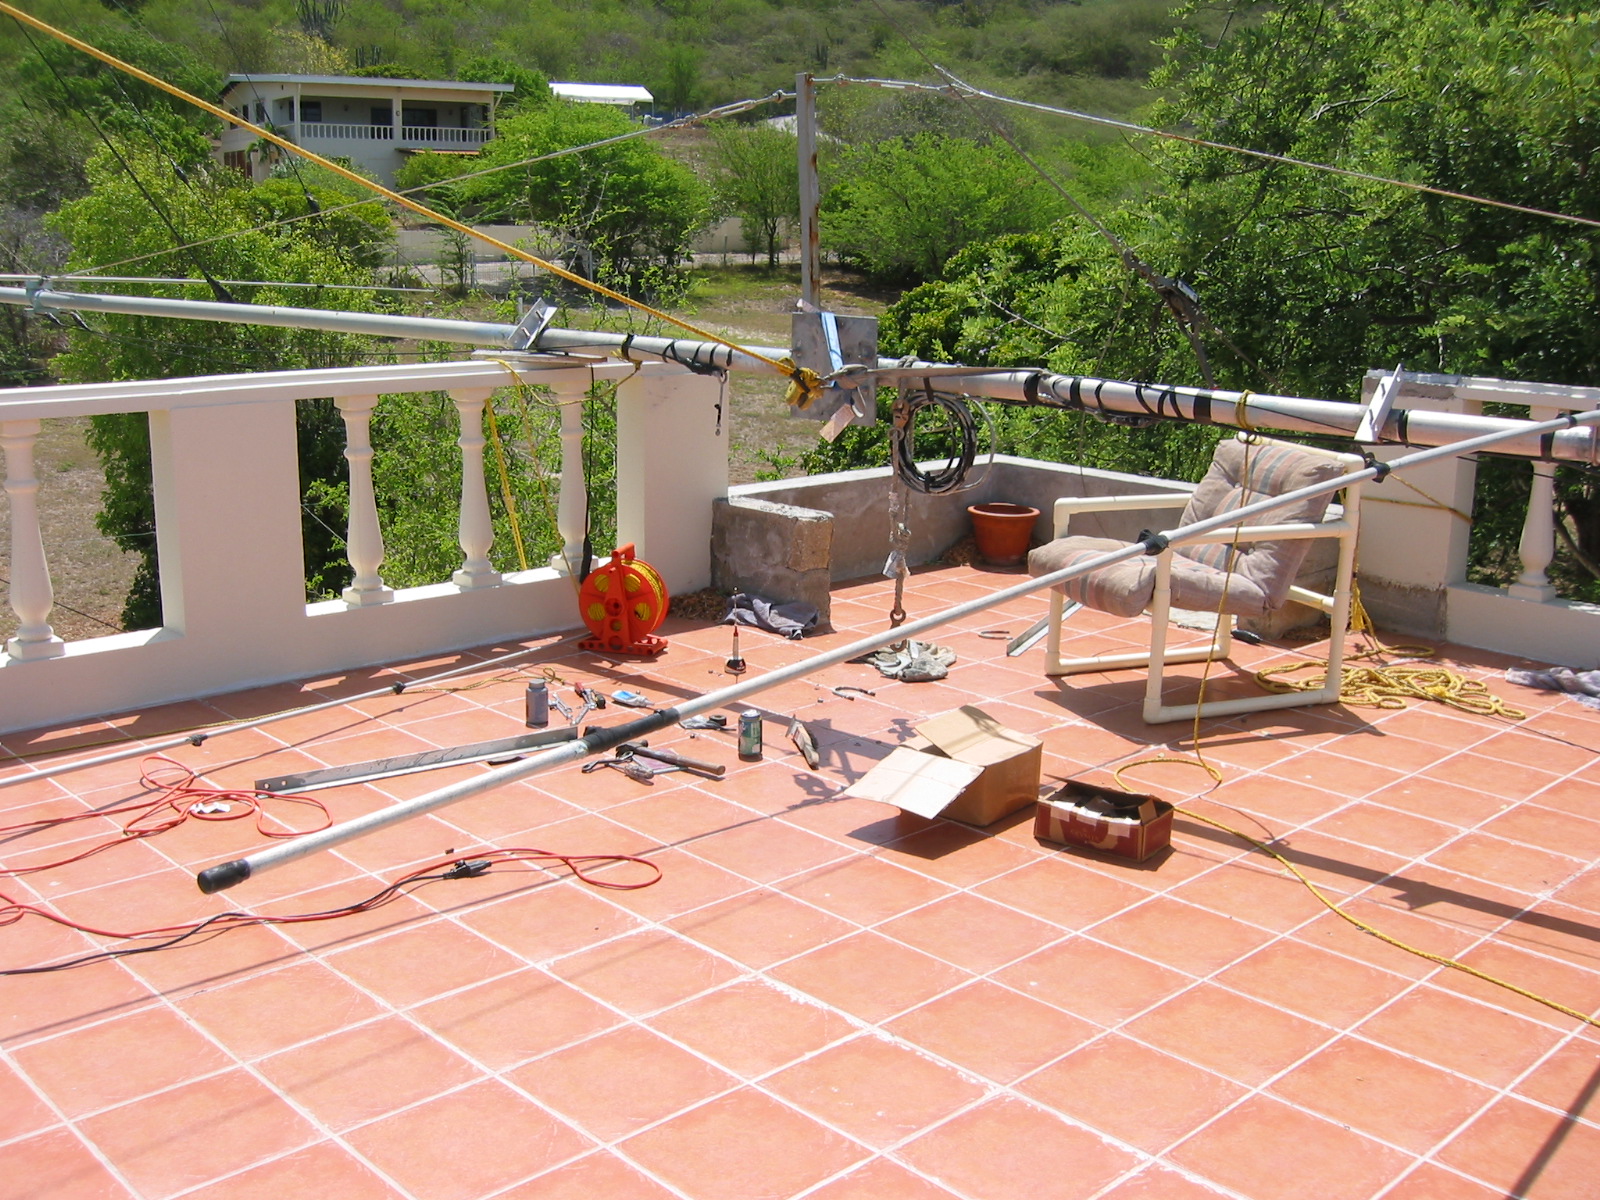 |
| Nearing the end, work continues on the front two elements on Thursday afternoon. | 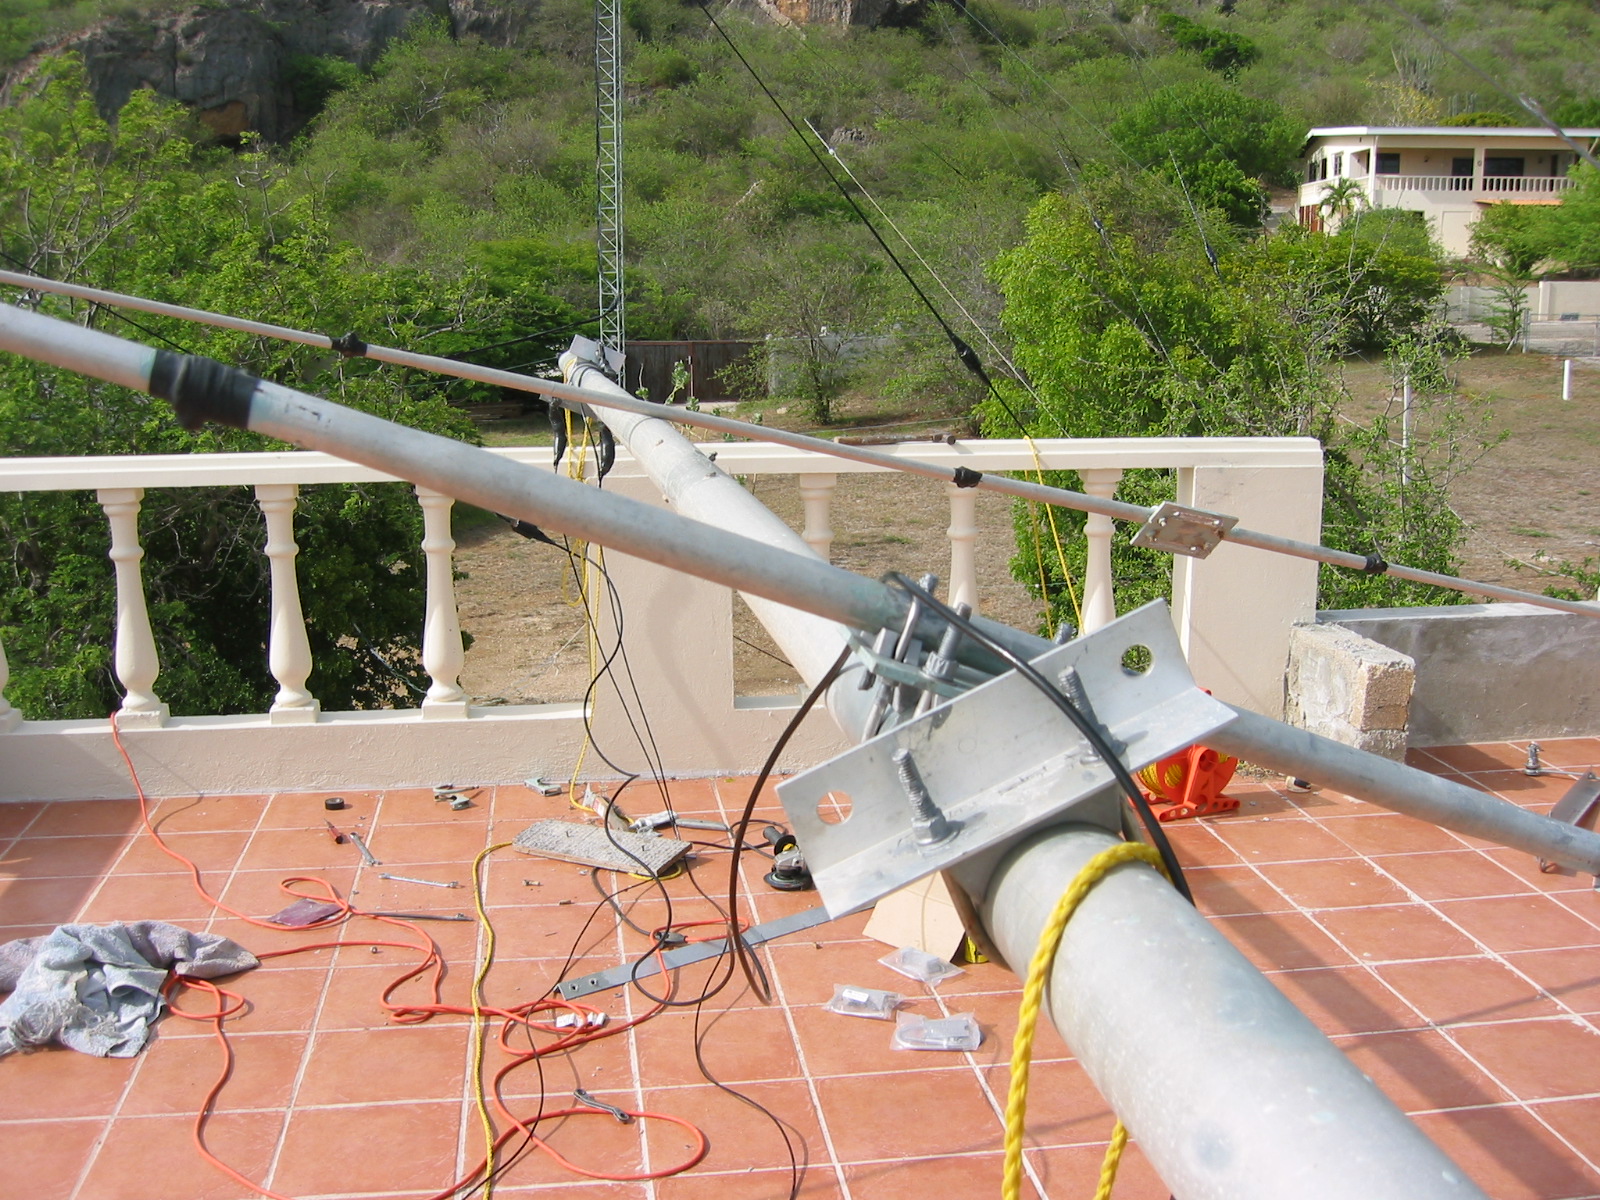 |
| I put on all new tie wraps and tape. This shows the renovated driven element point and you can see the new liquid electrical tape on the coax connector assembly. I even replaced all of the rubber element caps and the 3 inch boom end caps. We hope not to have to do this antenna again for 10+ years, so this renovation was VERY extensive. | 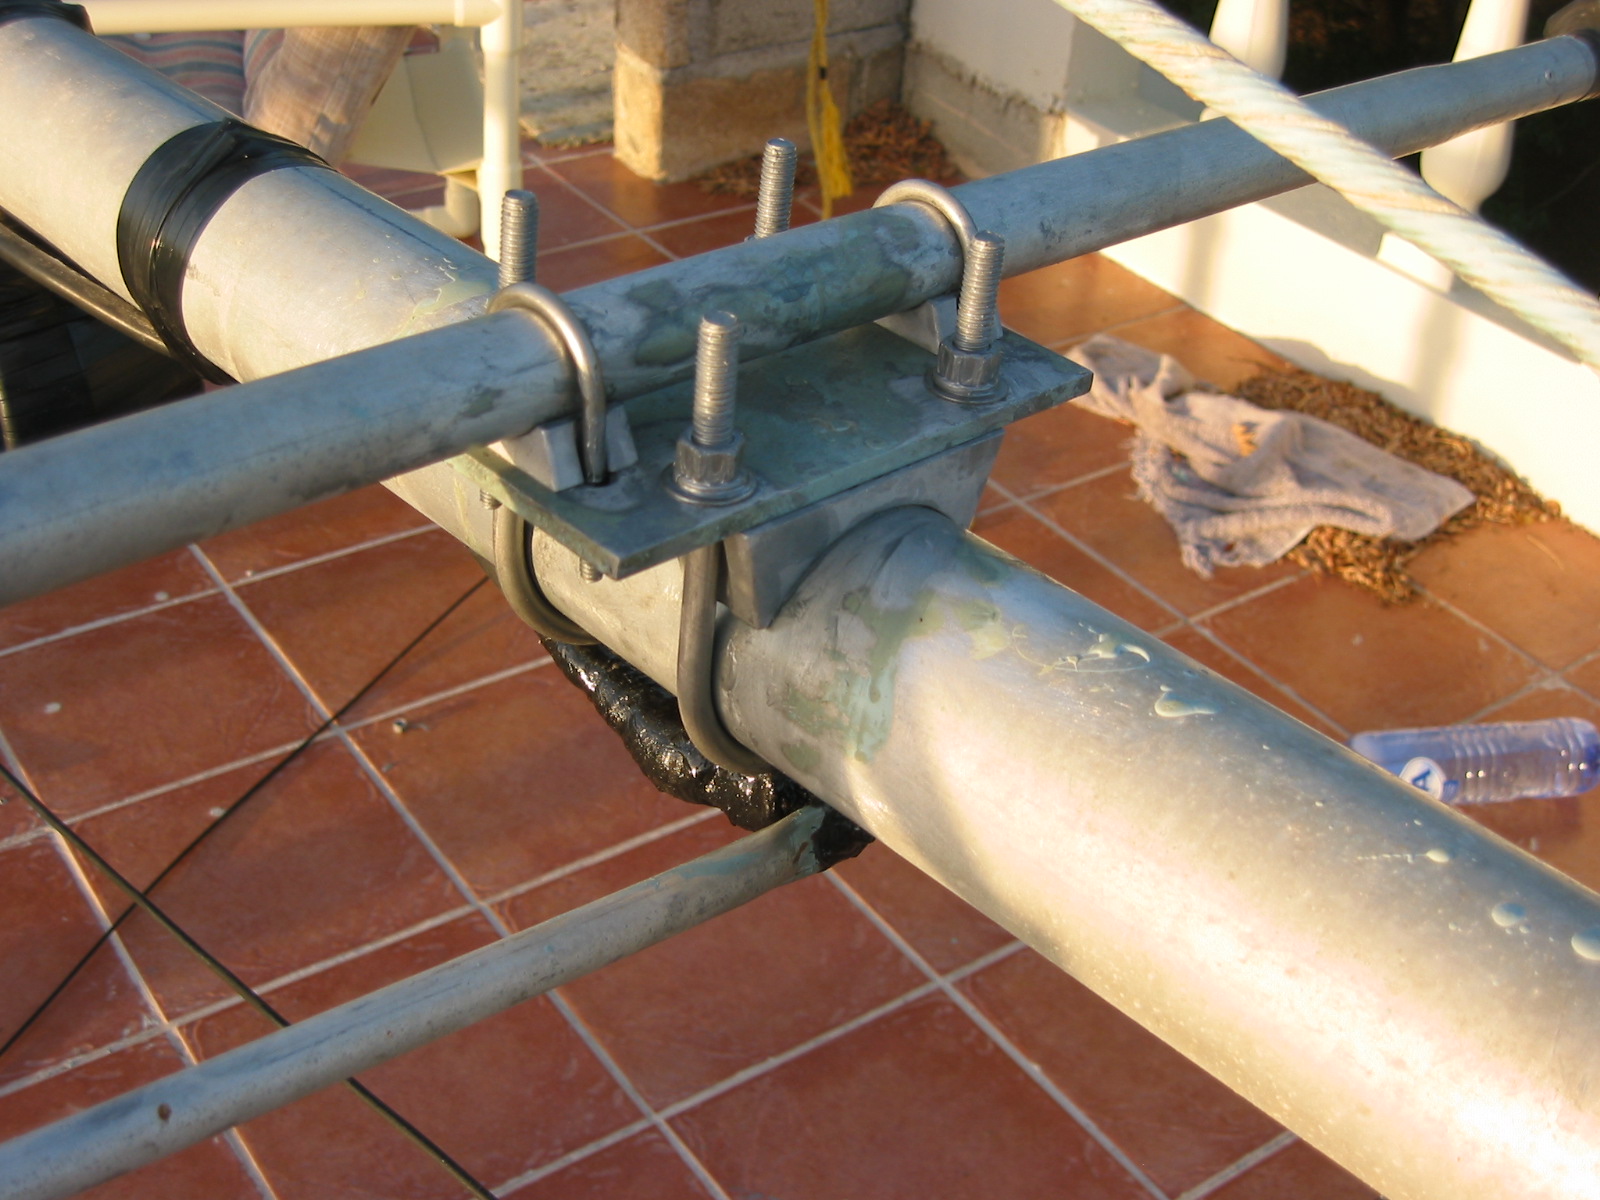 |
| Lowering the antenna on Tuesday was very tough on Carsten's and Salvatore's hands. It's heavy. K8ND and N8BJQ will remember. So I rigged a direction-changing pulley at the tower base, Sal wrapped himself in a beach towel, and he said the pull back up the tower was quite easy using this setup. This is Friday noon, just before we put it back up. | 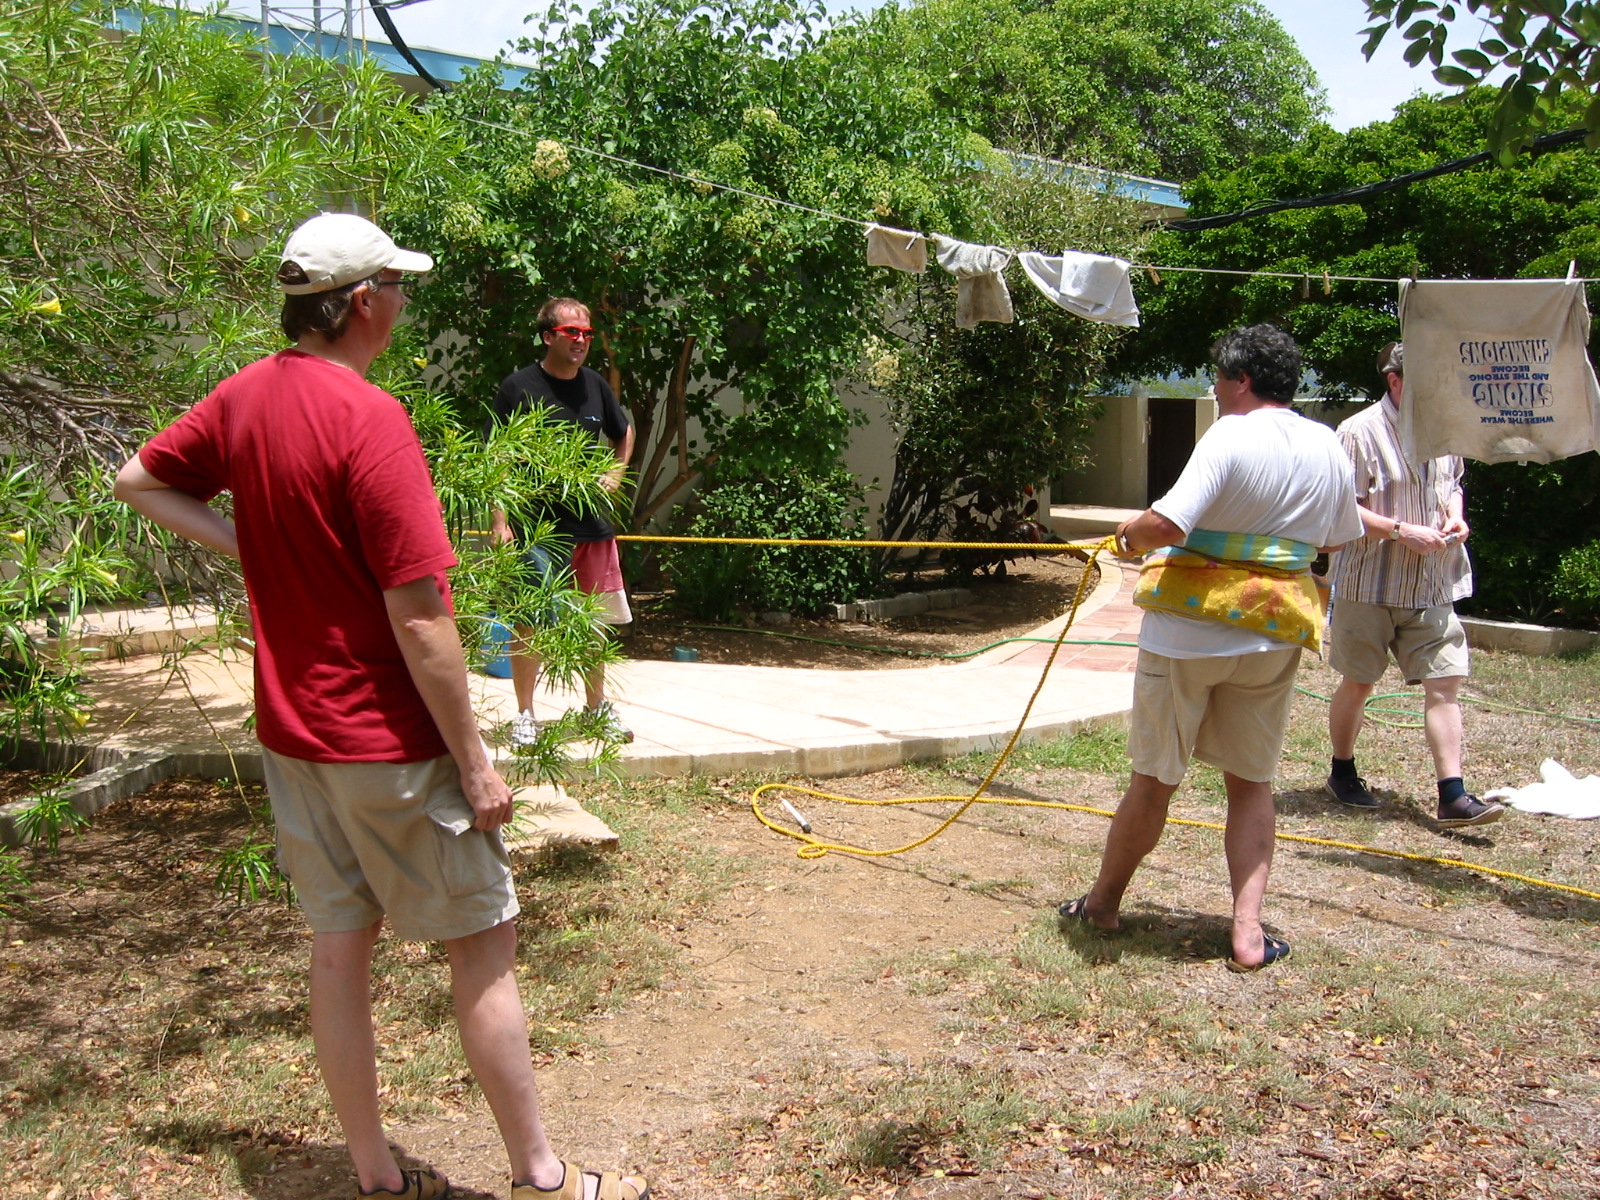 |
| A DJ8NK photo of me and Carsten reattaching the antenna. I muscled it into place and then he came up to help me place the hardware. This is the only antenna for which we did not fabricate a side mount cradle assembly last year. Now I kind of wish we had, as it's very tricky to reconnect this thing to the tower leg. Look above the tower to the 20 yagi -- you see the boom cradle in position waiting to receive the US/JA antenna once we are able to get it down and renovated. (There's an alignment boom piece in that cradle temporarily.) | 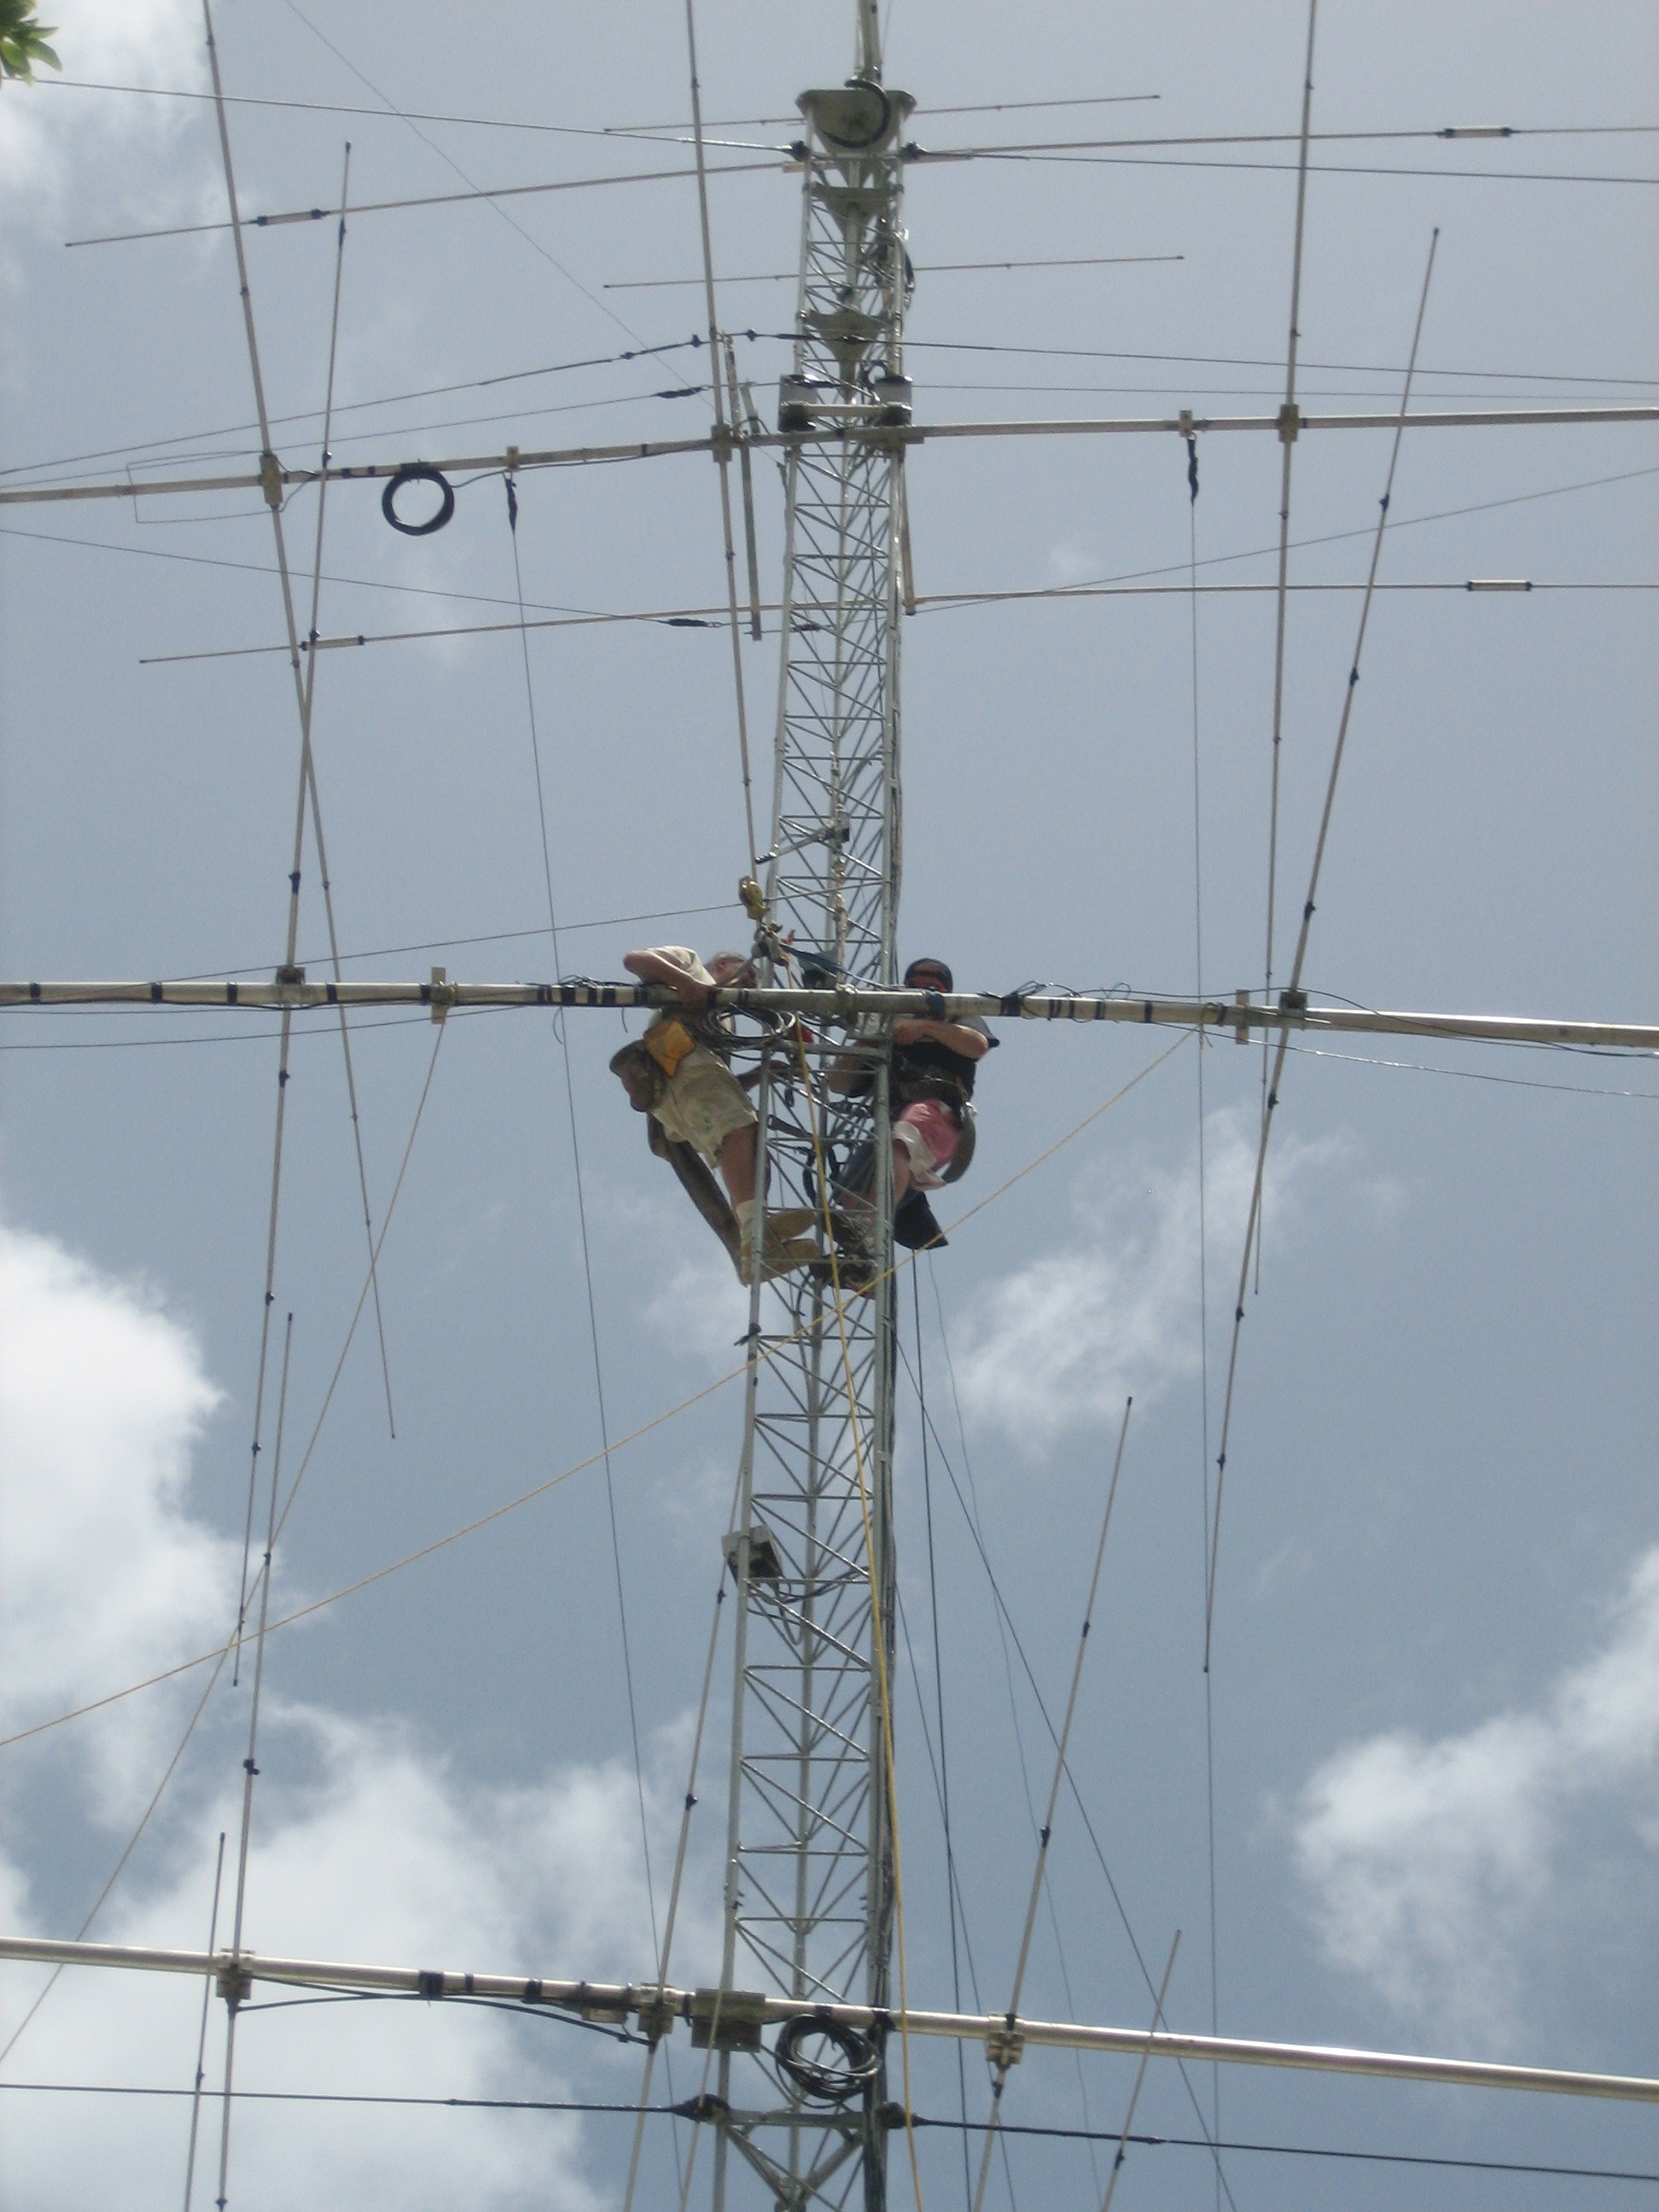 |
| Here DJ8NK caught me on Sunday afternoon repainting the railings which we marked up during the antenna project. It took a couple of days to take apart the rigging and clean up and put everything back away. | 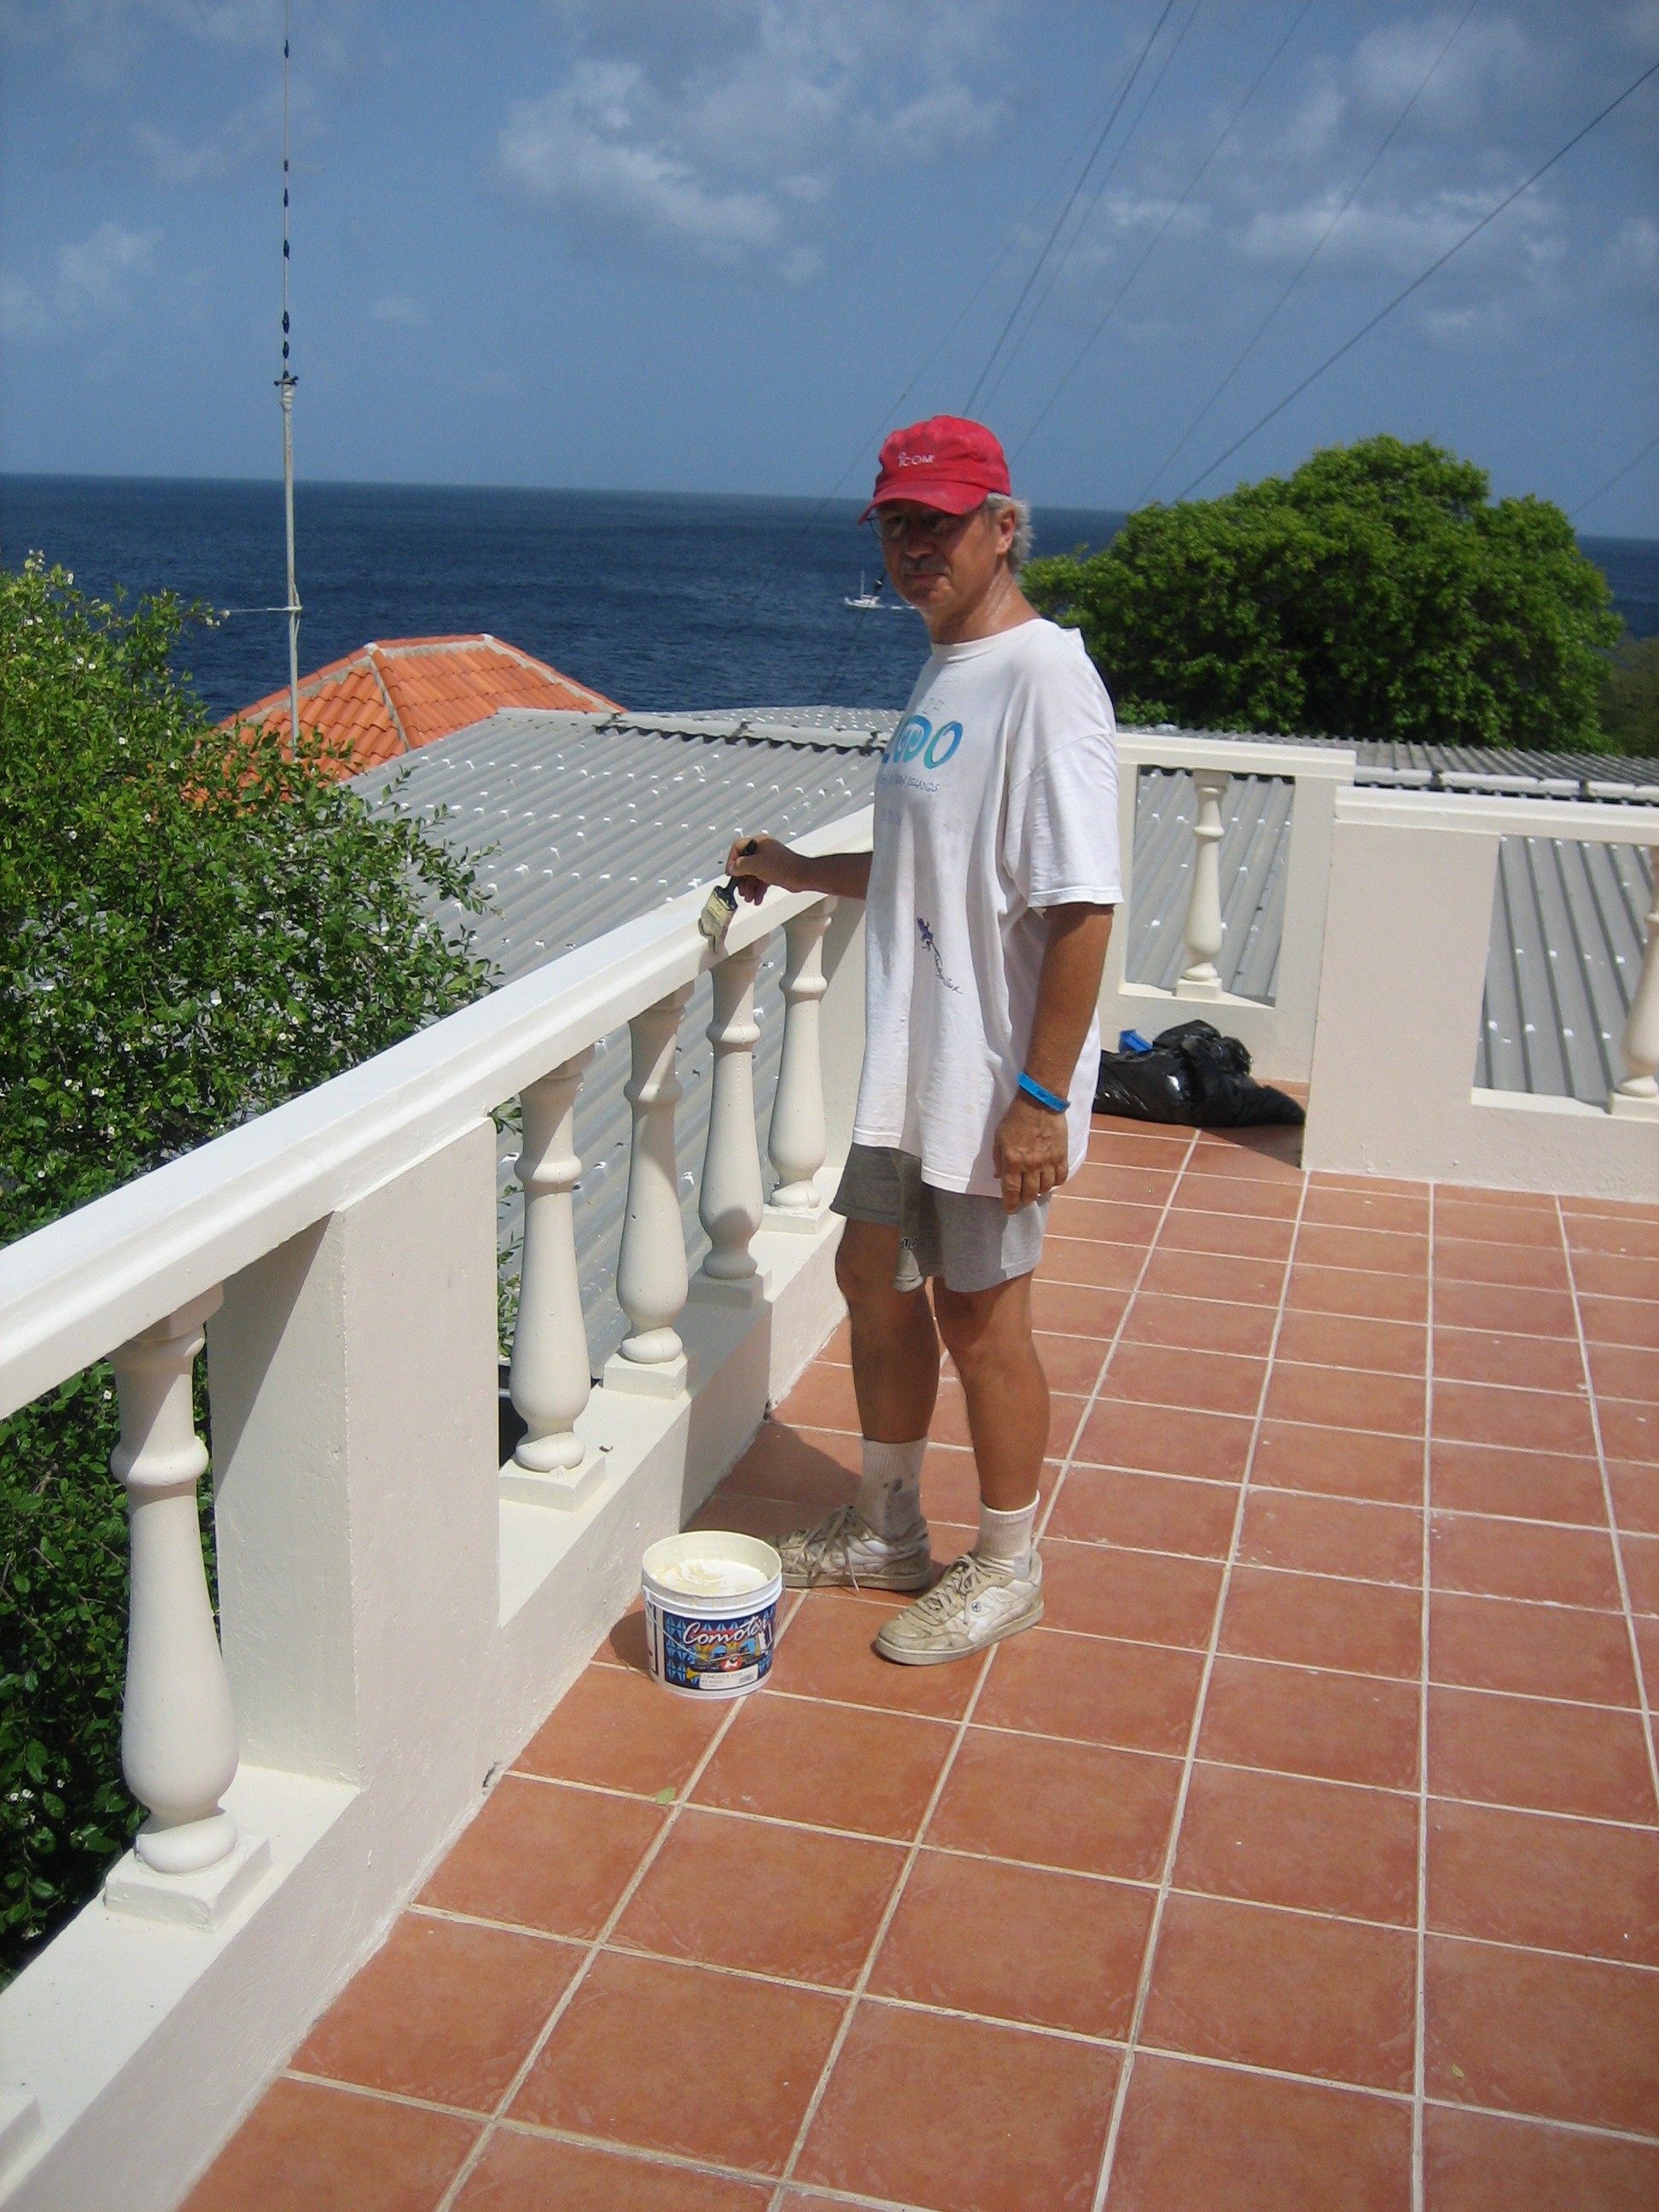 |
| The Payoff! Uli running rates to the US on 15 SSB on the renovated antenna. Signals were LOUD. While he did this, I worked much of Saturday on the tower, attaching the overhead and lateral trusses, tensioning them, and sealing everything against the salt. Now we really know what we're doing, and corrosion control will be much less a problem in the future. |  |